How To Use Butterfly Anchors? Step-by-Step Guide!
To use butterfly anchors, select the right size for your object’s weight and wall type. Gather a power drill, appropriate drill bit, tape measure, pencil, screwdriver, and cleaning tool.
Clean and mark the installation point, confirming the wall’s structural integrity. Drill a hole slightly larger than the anchor wings, then insert the anchor so the wings expand behind the wall. Verify resistance to make sure it’s secure.
Screw in your fixture, but avoid over-tightening. Use multiple anchors for heavier items and double-check weight limits. Follow these steps precisely to achieve stable mounts that last. Let’s explore each step in greater detail next.

Key Takeaways
Choosing the Right Size
When selecting the appropriate size of butterfly anchors, you need to consider the weight and type of the object you’re mounting, as well as the thickness of the wall. Start by evaluating the load-bearing capacity of different anchor sizes.
For heavier objects, such as shelving units or large mirrors, opt for larger butterfly anchors, typically rated for at least 50 pounds. Also, consider the wall type: drywall, plaster, or concrete. For drywall, choose anchors with longer wings to ensure a secure grip.
Measure the wall thickness accurately; anchors too short won’t engage properly, compromising stability. Precision matters use a caliper or measuring tape to avoid errors. Matching anchor size to your specific needs guarantees reliable, long-lasting installations.
Tools You’ll Need
Acquiring the necessary tools guarantees a smooth and efficient installation process when using butterfly anchors.
First, you’ll need a power drill with a set of high-speed steel drill bits, ensuring you match the bit size to your anchor specifications.
A tape measure is essential for precision in marking and spacing. A pencil or marker assists in creating accurate drilling points. Use a level to make certain your markings are perfectly horizontal.
A screwdriver, preferably a cordless one, speeds up the securing process of the anchor. Lastly, keep a vacuum or brush handy to clear away debris, ensuring a clean work area.
These tools collectively streamline the installation, making your butterfly anchors secure and reliable.
Preparing the Wall
Guaranteeing the wall’s surface is clean and free from any obstructions is crucial for a successful butterfly anchor installation.
Start by inspecting the wall for any dust, dirt, or loose paint. Use a damp cloth to wipe the surface clean, and let it dry completely.
Next, identify the exact location where you’ll install the anchor. Mark it precisely with a pencil, making sure it aligns with your intended load-bearing requirements.
For drywall, confirm there’s no electrical wiring or plumbing behind your chosen spot by using a stud finder or similar device. If you’re working with a concrete or brick wall, ensure it’s structurally sound without cracks.
This preparation ensures your butterfly anchor achieves maximum stability and longevity, supporting innovative projects reliably.
Installing Butterfly Anchors
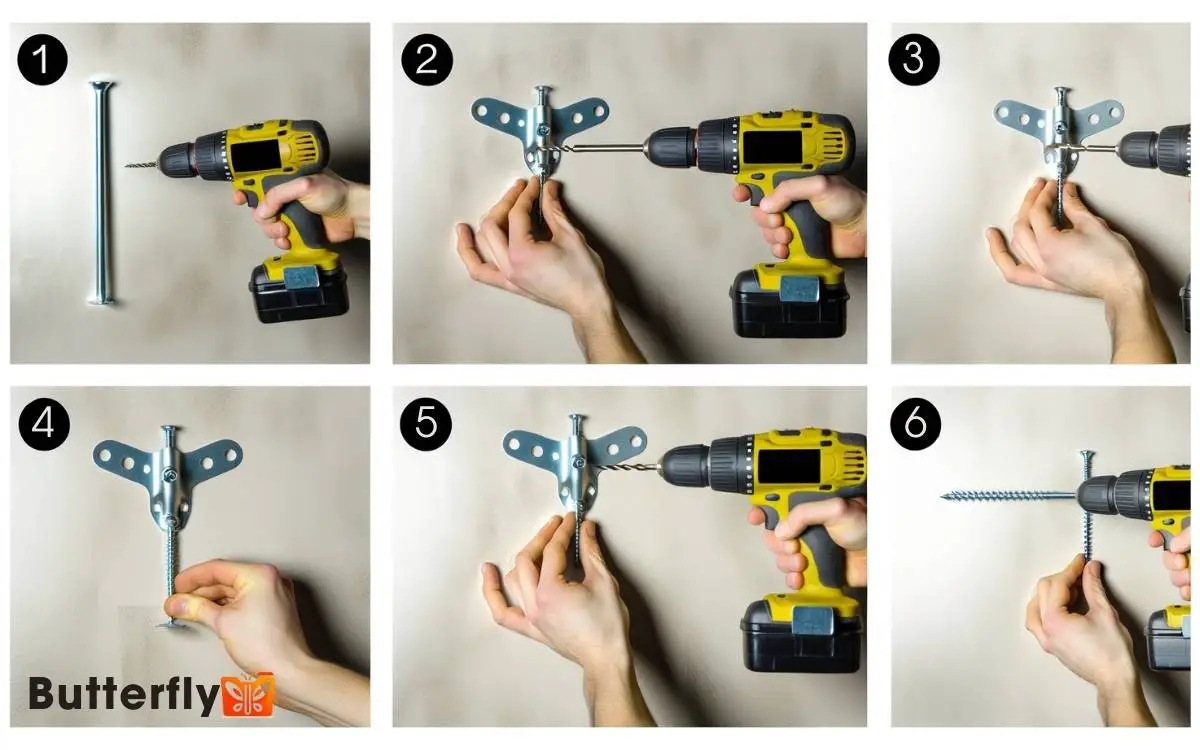
With your wall prepared and the installation point marked, start by drilling a hole slightly larger than the folded butterfly anchor‘s wings. Use a high-speed drill with a masonry bit for precise results.
Insert the folded anchor into the hole, making sure the wings collapse properly. Push the anchor until the wings fully expand behind the wall surface. You’ll feel resistance indicating the anchor is secure.
Thread the screw through your fixture and into the anchor. Tighten the screw until it’s flush with the fixture. Avoid over-tightening to prevent damage.
This process guarantees a robust hold for heavy items, leveraging the butterfly anchor’s design for maximum load distribution and stability. You’re now ready to mount your desired object confidently.
Tips for Secure Mounting
For secure mounting, always double-check the weight limits of both the butterfly anchors and the wall material. Confirm your anchors are rated for the load you intend to support.
Use a stud finder to avoid electrical wiring or plumbing behind the wall. When drilling, maintain a perpendicular angle to the surface to guarantee a snug fit.
Insert the anchor by squeezing its wings and pushing it through the hole until the wings expand behind the wall. Tighten screws gradually, making sure they pull the wings firmly against the inner surface.
For heavier items, distribute weight evenly with multiple anchors. Always use a level to verify alignment, and periodically inspect mounted items for stability and wear.
Conclusion
To sum it up, mastering butterfly anchors is like having a secret weapon in your DIY toolkit. Choose the right size, gather the necessary tools, and prepare your wall meticulously. Once installed, these anchors provide a rock-solid foundation for your projects. With their strong grip, you can confidently mount shelves, mirrors, or artwork without worrying about stability. Whether you’re learning how to hang chrysalis or securing heavy fixtures, butterfly anchors ensure everything stays firmly in place. Taking the time to install them correctly will save you headaches down the road!
Remember, precise preparation is key to secure mounting. With these expert tips, you’ll guarantee your fixtures stay put, no matter what. Now, go forth and anchor with confidence!


