How To Propagate A Butterfly Bush? Step-by-Step Guide!
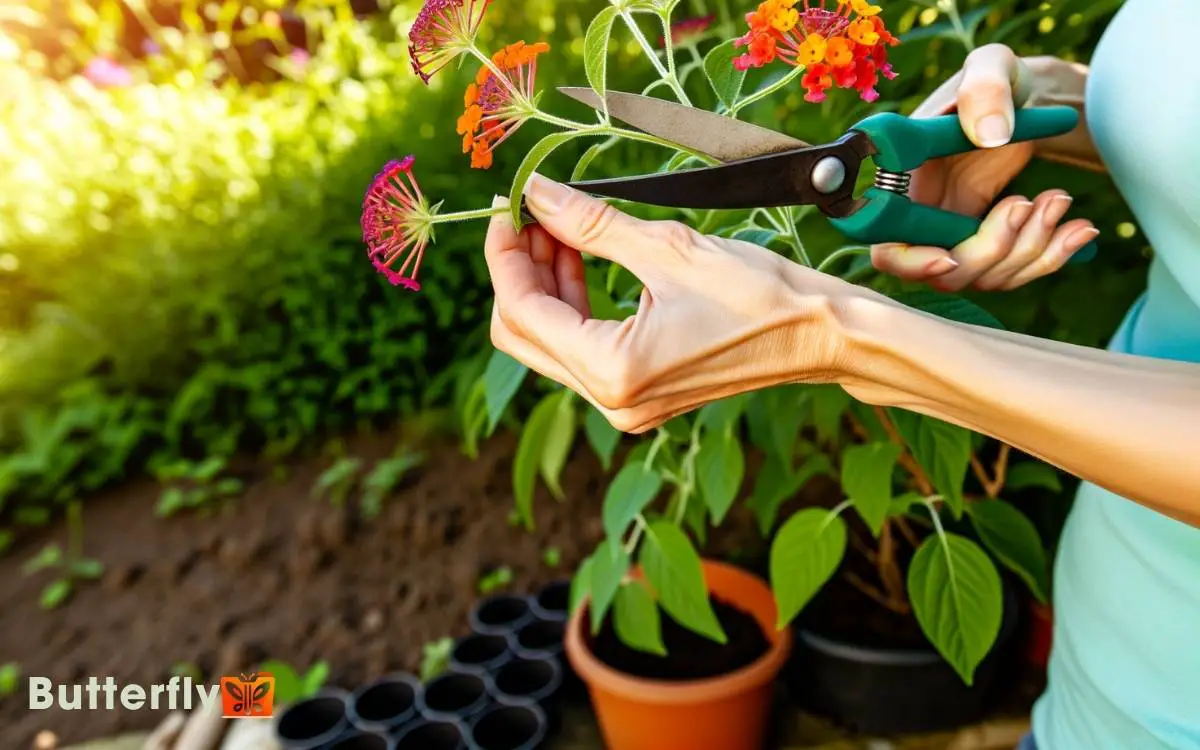
To propagate a butterfly bush, select a healthy, semi-hardwood stem and cut a 4-6 inch section with 2-3 nodes. Trim excess leaves and dip the cut end in rooting hormone.
Insert the cutting into a well-draining potting mix composed of perlite, vermiculite, and peat moss. Make sure the soil is moist and place the pot in indirect sunlight at 70-75°F. Use a plastic bag or dome for humidity control and monitor daily.
Water thoroughly and apply diluted, balanced liquid fertilizer once roots establish. For more on maintaining ideal conditions and transplanting, continue exploring.

Key Takeaways
Understanding Butterfly Bush Basics
A butterfly bush (Buddleja davidii) is a fast-growing, deciduous shrub known for its long, spike-like clusters of fragrant flowers that attract butterflies and other pollinators.
To understand its propagation, you’ll first need to grasp its basic biology. Butterfly bushes thrive in well-drained soil with a pH range of 6.0 to 7.5. They require full sunlight for best flowering and growth.
You’ll notice the plant’s opposite leaf arrangement and semi-woody stems, which can reach heights of up to 10 feet. For propagation, healthy, disease-free plants are essential. Recognize that they’re hardy in USDA zones 5 through 9, making them versatile in various climates.
This understanding sets the foundation for successful propagation techniques.
Best Time for Propagation
To guarantee successful propagation of your butterfly bush, focus on ideal seasonal conditions. Early spring and late summer provide the best timing due to favorable temperatures and growth cycles.
You’ll achieve better root development and plant vigor by adhering to these periods.
Optimal Seasonal Conditions
Spring’s warmer temperatures and increased daylight make it the ideal season for propagating a butterfly bush.
The table below outlines these critical parameters:
| Factor | Best Range | Notes |
|---|---|---|
| Soil Temperature | 60°F (15°C) | Essential for root initiation |
| Ambient Humidity | 50-70% | Reduces water stress on cuttings |
| Daylight Hours | 12-14 hours | Enhances photosynthetic activity |
These conditions optimize cellular respiration and photosynthesis, facilitating healthy growth. By adhering to these parameters, you ensure vigorous and robust propagation, setting the stage for thriving butterfly bushes.
Ideal Propagation Timing
Initiate butterfly bush propagation during early spring when soil temperatures consistently reach 60°F (15°C) to guarantee ideal root development.
Utilize a soil thermometer to monitor temperature accurately. Early spring offers best photoperiod and moisture levels, promoting vigorous root initiation.
Select healthy, semi-hardwood cuttings approximately 6 inches long. Make sure each cutting has at least two leaf nodes by removing the lower leaves. Dip the cut end in rooting hormone to enhance root formation. Plant the cuttings in a well-draining, sterile potting mix.
Maintain consistent moisture without waterlogging the medium. Position the containers in a location with indirect sunlight and temperatures between 65-75°F (18-24°C). Expect root establishment within 4-6 weeks, signified by new growth.
Choosing the Right Tools
Choosing the right tools, including sharp pruning shears and a clean knife, guarantees successful and clean cuts during the propagation process. Precision is key, so make certain your tools are sterilized to prevent any pathogen transmission.
Here’s a concise list of essential tools:
- Pruning Shears: Opt for bypass shears, which make cleaner cuts, minimizing damage to the plant tissue.
- Sterile Knife: Use a knife with a sharp, straight blade to make precise incisions. Sterilize with rubbing alcohol before use.
- Rooting Hormone: Although not a tool, it’s crucial for promoting root development in cuttings.
Selecting Healthy Cuttings
When choosing healthy cuttings for propagating your butterfly bush, prioritize stems that exhibit vigorous growth and are free from damage.
Inspect each stem meticulously for signs of diseases such as discoloration, wilting, or fungal infections.
Confirm that the chosen cuttings have multiple leaf nodes and a robust structure to maximize rooting success.
Choose Vigorous Stems
Select stems that are vigorous and healthy, showing no signs of disease or damage, to guarantee successful propagation of your butterfly bush.
Focus on stems that are semi-hardwood, typically from the current season’s growth, as they root more readily.
Follow these steps to make sure you’re selecting the best candidates:
- Length: Choose stems that are 4-6 inches long, providing enough material for rooting.
- Nodes: Confirm each stem has at least 2-3 nodes, as these are critical for root and shoot development.
- Leaves: Opt for stems with healthy, green leaves, avoiding any that are wilted, yellowing, or damaged.
Using these guidelines, you’ll secure the healthiest cuttings, optimizing your chances for robust butterfly bush propagation.
Inspect for Diseases
Carefully examine each stem for signs of disease, such as discoloration, spots, or unusual growths, to make sure you’re only using healthy cuttings for propagation.
Look for fungal infections, indicated by black or brown spots, and avoid stems with these symptoms.
Inspect for viral pathogens, recognizable by mosaic patterns or leaf curl, which can compromise new plants. Guarantee the stem is free from pests like aphids or spider mites, which can transmit diseases.
Use sterilized pruning shears to cut a 4-6 inch healthy stem from the butterfly bush. Place the cutting in a mixture of perlite and peat moss to encourage root formation. Keep the soil moist but not waterlogged to prevent rotting, and place the cutting in a warm area with indirect sunlight. After a few weeks, gently tug on the stem to check for resistance, which indicates successful root formation. If you’re also interested in learning how to plant butterfly weed, choose a well-draining location with full sun and plant the seeds in early spring for the best results.
Preparing the Cuttings
Start by choosing healthy, non-flowering stems from your butterfly bush, ideally around six inches long. Remove any leaves from the lower half to prevent rot and aid in root development.
Follow these steps to guarantee the best results:
- Sterilize Tools: Use isopropyl alcohol or a solution of 10% bleach to disinfect pruning shears, reducing the risk of infection.
- Cut at a 45-Degree Angle: This increases the surface area for water absorption, enhancing the cutting’s survival rate.
- Trim Excess Leaves: Leave only a few leaves at the top to balance photosynthesis and water retention.
Guarantee each cutting has at least one node, as this is where roots will form. Keep the cuttings in a cool, shaded area until ready for the next step.
Rooting Hormone Application
To enhance root development, dip the lower end of each cutting into a rooting hormone powder, ensuring thorough coverage.
This step stimulates faster root initiation and increases the chances of successful propagation. Use a clean, dry container to hold the powder and gently tap the cutting to remove excess.
Below is a guide to common rooting hormone types and their application:
| Rooting Hormone Type | Active Ingredient | Application Method |
|---|---|---|
| Powder | Indole-3-butyric acid (IBA) | Dip cutting, tap off excess |
| Liquid Concentrate | Naphthaleneacetic acid (NAA) | Dilute in water, soak cutting |
| Gel | IBA and NAA mix | Dip cutting directly into gel |
Ensure consistent application for best results. Handle rooting hormones with care, as they are potent and require precise usage.
Potting the Cuttings
To pot the cuttings, select containers with adequate drainage holes to prevent waterlogging.
Use a well-draining soil mix, ideally a combination of peat, perlite, and sand, to guarantee proper aeration.
Water the cuttings thoroughly but avoid oversaturation, maintaining consistent moisture levels for best root development.
Choosing Right Containers
Selecting the right containers for potting your butterfly bush cuttings guarantees excellent root development and plant health. Choose containers that facilitate ideal growth conditions and secure successful propagation.
Here’s what you need:
- Size: Use a container at least 4 inches in diameter. It provides ample space for root expansion while avoiding waterlogging.
- Material: Opt for biodegradable pots or high-quality plastic containers. Biodegradable options support eco-friendly practices, while plastic ensures durability and reusability.
- Drainage: Ensure the container has multiple drainage holes. Proper drainage prevents root rot and promotes aeration.
Soil Preparation Tips
Proper soil preparation is essential for ensuring your butterfly bush cuttings establish strong, healthy roots. Begin by selecting a well-draining, sterile potting mix.
A blend of perlite, vermiculite, and peat moss in a 1:1:1 ratio is ideal. This combination promotes aeration and retains necessary moisture without causing waterlogging.
Fill your chosen container with the prepared mix, leaving a half-inch gap at the top to prevent overflow during watering. Gently firm the soil to eliminate air pockets, ensuring consistent contact with the cutting.
Before inserting the cutting, consider dipping it in rooting hormone to enhance root development. Create a hole in the soil with a pencil, place the cutting, and lightly press the soil around it to secure stability.
Watering and Care
After you’ve inserted the cutting, make sure it remains consistently moist by watering thoroughly until water drains from the bottom of the container.
This guarantees the substrate is saturated and promotes ideal root development. Place the container in indirect sunlight, maintaining a stable temperature of 70-75°F (21-24°C).
Follow these steps for best results:
- Monitor Moisture Levels: Check the soil daily. Water when the top inch feels dry.
- Humidity Control: Use a plastic bag or a propagation dome to retain humidity around the cutting.
- Nutrient Management: After roots establish (in 4-6 weeks), feed with a diluted, balanced (10-10-10) liquid fertilizer every 2 weeks.
These practices will ensure strong growth and successful propagation of your butterfly bush.
Ideal Soil Mixture
To guarantee the best growth of your butterfly bush, you should use a soil mixture that combines well-draining components such as sand, loam, and organic matter. Begin with a base of 40% loam, which maximizes moisture retention and drainage.
Add 30% coarse sand to enhance aeration and ensure excess water escapes efficiently. Incorporate 30% organic matter, like compost or well-rotted manure, to enrich the soil with essential nutrients and improve its structure.
Mix these ingredients thoroughly to achieve a homogenous blend. Aim for a slightly acidic to neutral pH level, ideally between 6.0 and 7.0.
This soil composition will create an ideal environment, promoting robust root development and vigorous growth for your butterfly bush.
Watering and Humidity
Once you’ve prepared the ideal soil mixture, guarantee your butterfly bush thrives by providing consistent watering and maintaining appropriate humidity levels. Watering and humidity are critical for robust plant development.
Follow these steps:
- Watering Schedule: Water the plant deeply once or twice a week. Make sure the soil remains moist but not waterlogged. Overwatering can cause root rot.
- Humidity Control: Maintain a relative humidity of 40-60%. Use a hygrometer to monitor levels and a humidifier if necessary.
- Mulching: Apply a 2-3 inch layer of organic mulch around the base to retain soil moisture and regulate temperature.
Providing Adequate Light
Guaranteeing your butterfly bush receives ample sunlight is essential for its vigorous growth and abundant blooming. Position your plant where it can access at least six hours of direct sunlight daily.
Inadequate light can lead to leggy growth and diminished flower production. Utilize a light meter to accurately measure the intensity of sunlight in the chosen location.
If natural light is insufficient, supplement with full-spectrum grow lights, maintaining a photoperiod of 14-16 hours.
Regularly rotate the plant to ensure uniform light exposure and prevent phototropism. By maximizing light availability, you’ll enhance photosynthetic efficiency, leading to robust growth and prolific flowering.
Transplanting to the Garden
When transplanting your butterfly bush to the garden, dig a hole twice as wide and just as deep as the plant’s root ball to guarantee proper root spread and stability.
Make sure the soil is well-draining and enriched with organic matter to promote vigorous growth. Before planting, water the root ball thoroughly to minimize transplant shock.
Follow these steps:
- Amend Soil: Mix compost or aged manure into the garden soil for enhanced fertility.
- Placement: Position the plant in the center of the hole, making certain the top of the root ball is level with the surrounding soil.
- Backfill: Fill the hole with soil, pressing gently to eliminate air pockets, then water thoroughly to settle the soil.
These steps will establish the foundation for a thriving butterfly bush.
Caring for New Plants
After establishing your butterfly bush in its new garden location, prioritize consistent watering to help the plant acclimate and develop a robust root system. Guarantee the soil remains moist but not waterlogged, as excess moisture can lead to root rot.
Apply a balanced, slow-release fertilizer to provide essential nutrients. Mulch around the base with organic material to retain moisture and regulate soil temperature.
Monitor for pests and diseases; early detection facilitates effective management. Prune dead or damaged branches to promote healthy growth.
During the first growing season, protect the plant from extreme weather conditions using row covers. Regularly inspect the plant’s growth and adjust care practices as necessary to support excellent development and flowering.
Conclusion
By mastering butterfly bush propagation, you’re not just expanding your garden, you’re cultivating a haven for pollinators.
While selecting healthy cuttings and ensuring proper humidity can seem challenging, remember, each step is a dance between precision and nature’s unpredictability.
Your meticulous care now will yield vibrant blooms and bustling wildlife later.
So, juxtapose your diligent efforts with the wild beauty of butterfly bushes and watch your garden transform into a thriving ecosystem.
Happy propagating!


