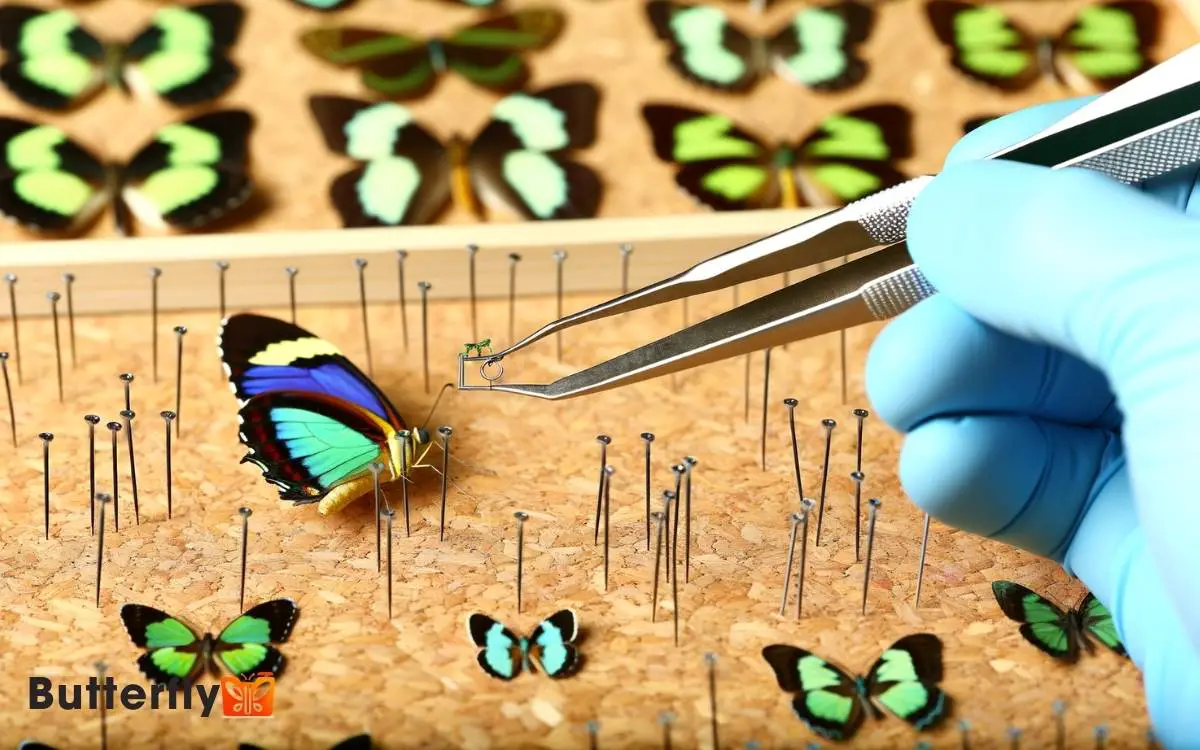
How To Pin A Butterfly? Preservation Guide!
To pin a butterfly, start by gathering fine-tipped forceps, stainless steel entomological pins, and an adjustable spreading board.
Choose an ethically sourced specimen with vibrant colors and intact wings. Relax the butterfly in a humid chamber.
Insert a pin through the thorax at a 90-degree angle for proper stabilization. Carefully position the wings on the spreading board and secure them.
Let the butterfly dry in a well-ventilated area. Label the specimen with scientific information and collector details.
Finally, display it in a UV-protected glass case with controlled humidity. For the intricate steps and tips, continue exploring further.

Key Takeaways
Gather Your Materials
You’ll need to gather essential materials like forceps, pins, a spreading board, and a butterfly specimen before you begin.
First, select fine-tipped forceps for delicate handling, minimizing damage to the wings and body. Stainless steel entomological pins, preferably size 2 or 3, guarantee ideal support without causing excessive damage.
A spreading board is essential; choose an adjustable one to accommodate various wing spans. Precision is paramount, so make sure the board’s slots are clean and secure. Additionally, have a foam or cork base to pin the specimen securely.
To conclude, prepare a storage container with silica gel to maintain low humidity, preventing mold and degradation. By meticulously gathering these tools, you’ll streamline the pinning process, achieving professional results.
Choose a Specimen
To start, identify ideal species that showcase vibrant colors and patterns, as they’ll be most visually appealing.
Secure ethical specimens, either from reputable suppliers or responsibly collected from the wild.
Once acquired, prepare the butterfly for preservation by relaxing its wings and softening its body for easier handling.
Identifying Ideal Species
Selecting an ideal butterfly specimen requires examining factors such as species rarity, color vibrancy, and wing integrity. First, choose species that aren’t endangered to guarantee sustainability.
Look for those with striking colors; vibrant hues indicate a healthy specimen. Assess wing integrity closely damaged wings detract from the specimen’s display quality. Use a magnifying glass to inspect for tears or missing scales.
For best results, select butterflies in their prime adult stage; their wings will be fully developed. Additionally, consider the specimen’s size, as larger butterflies are easier to pin and display.
Sourcing Ethical Specimens
When sourcing ethical butterfly specimens, prioritize obtaining them from reputable suppliers who adhere to sustainable and legal collection practices.
Ethical suppliers often provide detailed collection data, including locality, date, and method, ensuring compliance with conservation regulations.
Choose specimens from captive-breeding programs or those collected under permits that support habitat protection initiatives.
Verify the supplier’s accreditation with organizations like the Entomological Society of America or the International Butterfly Breeders Association.
Additionally, consider specimens that have been sustainably sourced from butterfly farms, where local communities benefit economically while conserving native habitats.
Avoid specimens from overexploited or threatened species unless they’re legally obtained and come with proper documentation.
Always cross-check your sources and maintain a detailed log for future reference and scientific integrity.
Preparing for Preservation
After ensuring you have ethically sourced specimens, start by choosing a butterfly that’s in good condition, with intact wings and body.
Examine the wings for any tears, scales loss, or discoloration, as these can affect the specimen’s aesthetic and scientific value.
Utilize fine-tipped forceps for handling to avoid damaging the delicate structures. Focus on selecting specimens with symmetrical wings and a firm, unbroken thorax and abdomen.
Once you’ve selected a suitable butterfly, place it in a sealed container with a damp paper towel to relax the muscles.
This step is vital for proper wing positioning during pinning. Make sure the container is kept in a cool, dark place for 24-48 hours. This process will make the specimen pliable, reducing the risk of breakage during subsequent steps.
Relax the Butterfly
To relax the butterfly, place it in a humid chamber for several hours to make sure its muscles become pliable for pinning. Use a sealed container with a layer of damp paper towels at the bottom.
Ensure the butterfly doesn’t touch the water by elevating it on a mesh platform. Maintain a consistent humidity level of around 70-80% to avoid mold growth.
| Step | Description | Time Required |
|---|---|---|
| 1 | Prepare humid chamber | 10 minutes |
| 2 | Place butterfly on platform | 5 minutes |
| 3 | Seal container | 2 minutes |
| 4 | Wait for relaxation | 3-6 hours |
Check periodically to make sure the butterfly’s appendages are flexible. This process is important for successful pinning and long-term preservation.
Insert the Pin
To insert the pin, position it vertically through the thorax, slightly off-center to avoid crucial structures.
- Confirm the pin is perpendicular to the work surface for specimen stability.
- Handle the wings gently to prevent damage while securing the butterfly in place.
Pin Placement Technique
- Guarantee precision by inserting the pin through the thorax at a 90-degree angle to stabilize the butterfly effectively.
- Use forceps to handle the butterfly gently, ensuring minimal damage to delicate wing structures.
- Position the pin directly through the center of the thorax, just behind the head and between the wing bases. This method secures the butterfly without distorting its natural posture.
- Make sure that the pin is perpendicular to the pinning board, maintaining an even angle for accurate display and study.
- The thorax, being the most robust part of the butterfly, provides excellent support. Utilize an entomological pin, which is finer and rust-resistant, to preserve the specimen’s integrity.
- This technique ensures your butterfly remains intact for research or display purposes.
Ensuring Specimen Stability
Guarantee the butterfly remains firmly in place by inserting the pin through the thorax with steady, controlled pressure.
First, align the pin vertically with the center of the thorax, slightly above the wings. Apply deliberate, even pressure to penetrate the exoskeleton without fracturing it.
Push the pin through until it extends approximately halfway out the other side. This secures the specimen’s stability for handling and display.
Engage a pinning block beneath the butterfly to maintain consistent height. Adjust the butterfly’s body so it stands perpendicular to the pin.
Use micro-forceps to fine-tune its position, ensuring the thorax is centered and stable. This method prevents lateral movement, securing the specimen for further examination or mounting.
Avoiding Wing Damage
Ensuring the butterfly remains stable is essential, but it’s equally important to insert the pin in a way that avoids damaging the delicate wings.
First, select an entomological pin and sterilize it to prevent contamination. Position the butterfly on a pinning board, ensuring its wings are fully extended.
Insert the pin through the thorax, specifically between the base of the forewings, to avoid the wing veins. Push the pin straight down, ensuring it doesn’t tilt, which could damage the wings.
Once the pin is through, adjust the butterfly’s position carefully with forceps. Secure the wings in place using paper strips pinned on either side, avoiding direct contact with the wings.
This method preserves wing integrity while maintaining the specimen’s stability.
Position the Wings
Carefully spread the butterfly’s wings using fine-tipped forceps to avoid damaging the delicate scales.
Start by gently gripping the forewing‘s lower edge, slowly lifting and spreading it outward. Align the forewing so it’s perpendicular to the body axis. Repeat for the opposite wing, guaranteeing symmetry.
Next, position the hindwings by gently maneuvering them into place beneath the forewings, maintaining a natural overlap.
Adjust both hindwings so they mirror each other, preserving anatomical accuracy. Confirm the thorax remains centered and the abdomen isn’t twisted.
This meticulous alignment is essential for scientific integrity and aesthetic presentation. By following these steps, you’ll create a specimen that showcases the butterfly’s natural beauty while preserving its structural integrity.
Secure the Butterfly
With the wings properly positioned, insert an insect pin vertically through the thorax, just behind the head, to secure the butterfly.
Guarantee the pin goes through the central axis for stability. Position the butterfly on a spreading board, aligning it symmetrically. Use additional pins to gently hold the wings in place without piercing them.
Here’s a visual guide:
| Step | Action | Purpose |
|---|---|---|
| 1 | Insert pin through thorax | Secure butterfly’s body |
| 2 | Position on spreading board | Achieve symmetrical alignment |
| 3 | Use additional pins on wings | Stabilize wings without damage |
Maintain precise angles and spacing to preserve anatomical integrity. Your careful attention to detail assures the specimen’s scientific and aesthetic value.
Allow to Dry
To allow the butterfly to dry, place it in a well-ventilated, dry environment, making sure it remains undisturbed for several days. Position the specimen carefully on a drying board, which will maintain its wings in the desired position.
Utilize a desiccant, such as silica gel, to absorb ambient moisture and accelerate the drying process. Verify the stability of the pins and make sure the wings are spread symmetrically.
Monitor the drying process periodically, but avoid excessive handling to prevent damage. It’s important to maintain a consistent temperature and humidity level to avoid compromising the structural integrity of the specimen.
After several days, the butterfly will be thoroughly desiccated, preserving its morphological features efficiently for long-term study and display.
Label the Specimen
Verify that the specimen’s label includes the butterfly’s scientific name, collection location, date, and collector’s name, meticulously written in permanent ink to prevent fading.
Confirm the label is cut to a uniform size, typically 12×8 mm, to maintain consistency. Use archival-quality paper to avoid degradation over time.
Securely attach the label to the pin beneath the butterfly, ensuring it’s aligned and readable. Position the pin through the center of the label to secure it firmly.
Double-check for legibility and accuracy, as errors could compromise scientific value. Employ a fine-tipped pen for precision.
This attention to detail enhances the specimen’s research utility and aesthetic presentation, catering to innovative display methodologies in entomological collections.
Display Your Butterfly
Displaying your butterfly involves carefully positioning the specimen in a display case that minimizes light exposure and environmental fluctuations to preserve its color and structure. Select a UV-protected glass case to prevent fading.
Mount the butterfly using entomological pins on a foam board, ensuring the wings are symmetrically spread. Maintain humidity levels between 40-60% to avoid desiccation or mold growth. Place silica gel packets inside the case to regulate moisture. For best results, allow the specimen to dry completely over several days before transferring it to a display case. When learning how to mount a butterfly, handle the delicate wings with forceps to prevent damage. Finally, keep the mounted specimen in a cool, dry place away from direct sunlight to preserve its colors.
Secure the case in a stable environment, away from direct sunlight and temperature variations. Label the specimen’s scientific name, collection date, and location.
Conclusion
Remember, pinning a butterfly is like preserving a fleeting moment of beauty for future admiration. Just as a photographer captures a perfect sunset, you’ve immortalized nature’s artwork.
With each step relaxing, pinning, positioning, and labeling you’ve transformed a delicate specimen into a scientific artifact. Your dedication guarantees that future enthusiasts will appreciate the butterfly’s intricate details.
Now, display your specimen proudly, knowing you’ve contributed to the ongoing study and appreciation of these remarkable insects.


