How To Make A Fabric Butterfly? Easy DIY Guide!
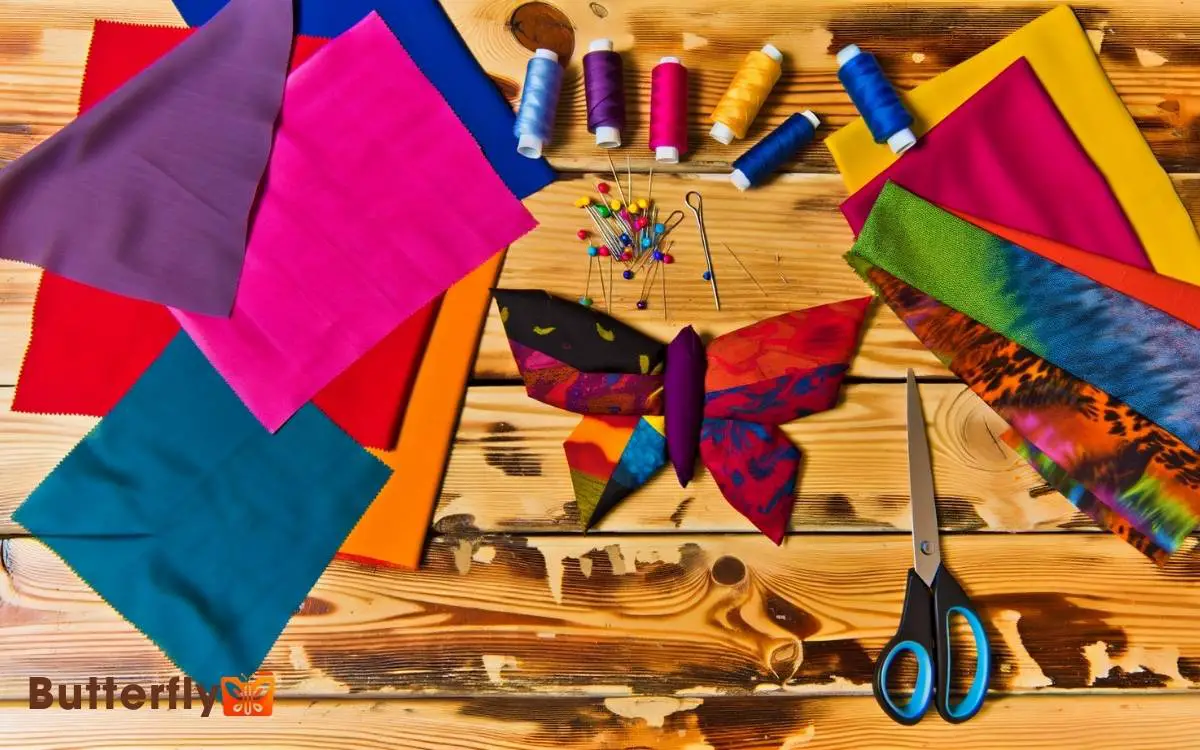
To make a fabric butterfly, gather high-quality fabric glue, sharp fabric scissors, a fine needle with matching thread, fabric markers, and wire or pipe cleaners.
Choose your fabric silk for sheen, cotton for versatility, felt for structure, or organza for a magical touch. Trace and cut symmetrical wing shapes, then stitch them together using backstitch and ladder stitch. Stuff the wings with fiberfill, ensuring even distribution.
Secure the edges with precise stitching, shape the wings by folding and curving, and add antennae with thin wire or embroidery floss. For detailed decoration and finishing steps, continue exploring the process.
Key Takeaways
Gather Your Materials
Have you ever wondered what essential materials you need to create a stunning fabric butterfly?
First, gather high-quality fabric glue to guarantee your creation holds together beautifully. You’ll need sharp fabric scissors for precision cutting, and a fine needle with matching thread for detailed stitching.
Don’t forget fabric markers or chalk for drawing your butterfly’s intricate patterns. Wire or pipe cleaners will give your butterfly structure and flexibility. A variety of embellishments, like sequins, beads, and fabric paint, will add that innovative touch.
Choose Your Fabric
Selecting the perfect fabric for your butterfly is crucial, as it determines both the aesthetic appeal and the durability of your creation. You’ll want to contemplate textures, colors, and patterns that not only catch the eye but also hold up well over time.
Here are some tips to guide your choice:
- Silk: Offers a luxurious sheen and fluidity, perfect for an elegant, delicate butterfly.
- Cotton: Easy to work with and available in countless prints, making it versatile for various designs.
- Felt: Adds structure and is ideal for creating a more robust butterfly with defined edges.
- Organza: Provides a translucent, ethereal quality, adding a magical touch to your creation.
Cut Fabric Shapes
Begin by laying your chosen fabric flat on a clean, smooth surface to guarantee precise and effortless cutting of the butterfly shapes. Use a sharp fabric scissors for clean edges.
Trace a butterfly template onto the fabric using tailor’s chalk or a disappearing ink pen. Confirm symmetry by folding the fabric in half before you cut, allowing both sides to mirror each other perfectly.
For added innovation, layer different fabrics together for a multi-textured effect. Pin the layers in place to prevent shifting.
Once traced, cut carefully along the lines, maintaining steady pressure to avoid jagged edges. This meticulous approach confirms each butterfly wing maintains its shape, ready to bring your creative vision to life.
Prepare the Needle and Thread
With your butterfly shapes neatly cut, thread a needle with a length of strong, coordinating thread to guarantee your fabric pieces come together seamlessly.
Select a thread color that complements your fabric, ensuring it blends naturally and enhances the butterfly’s visual appeal. Cut a piece of thread that’s about 18 inches long to give you plenty of room to work without tangling.
- Thread the needle: Insert the thread through the needle’s eye, leaving an even length on both sides.
- Tie a knot: Secure the ends of the thread with a small, tight knot to prevent slipping.
- Condition the thread: Run it through beeswax or a thread conditioner to reduce fraying.
- Test the strength: Gently tug the thread to confirm it’s sturdy enough for your project.
Sew the Butterfly Body
Stitch the two fabric butterfly shapes together, starting at the base of the wings and working towards the body, making sure your seams are tight and evenly spaced. Use a backstitch for extra durability, as this will give your butterfly a structured, professional finish.
As you sew, maintain a steady hand and consistent tension on the thread to avoid puckering.
When you reach the body, shift to a ladder stitch, which will create an almost invisible seam, enhancing the butterfly’s aesthetic appeal. Carefully align the edges to guarantee symmetry. Don’t rush precision is key.
Once you’ve completed the stitching, gently press the seams with an iron on a low setting to smooth out any irregularities, preparing the butterfly for the next steps.
Attach the Wings
Now that you’ve completed the body, it’s time to bring your butterfly to life by attaching its wings.
Carefully position each wing so that they mirror each other perfectly, ensuring a balanced look.
Use small, precise stitches to secure the wings firmly, making sure they align seamlessly with the body.
Position the Wings Properly
Guaranteeing the wings are aligned symmetrically is crucial to achieving a balanced and realistic butterfly.
- Begin by laying the butterfly body flat on your workspace.
- Position each wing carefully, making sure they mirror each other perfectly. Symmetry is key.
- Utilize a ruler or measuring tape to verify equal distance from the body’s center to each wing’s edge.
- Secure the wings temporarily in place to ensure they don’t shift while you finalize their position.
- Double-check angles by folding the butterfly in half to see if the wings match up.
- Adjust as necessary until you’re satisfied with their alignment.
This meticulous positioning will set the foundation for a stunning, innovative fabric butterfly that captures the essence of nature’s symmetry.
Secure With Stitches
To securely attach the wings, thread your needle with a strong, matching thread and anchor it firmly at the base of one wing. Begin by making a few tight, small stitches to guarantee the thread won’t slip.
Next, align the wing’s edge with the butterfly body and start stitching along the perimeter using a neat whipstitch. This technique will provide both flexibility and strength. Keep your stitches close together for a seamless look.
When you reach the opposite base, tie off the thread with a double knot for extra security. Repeat the process for the second wing.
For added innovation, consider using metallic or contrasting thread to give your butterfly an artistic touch. Your fabric butterfly’s wings are now securely attached, ready to flutter!
Add Embellishments
Now comes the fun part adding embellishments to your fabric butterfly! Choose sparkling accents like sequins or tiny beads to give it a glimmering effect.
Secure these decorative elements with a fine needle and thread, ensuring they’re evenly distributed for a balanced, eye-catching look.
Choose Sparkling Accents
Selecting the perfect sparkling accents, such as sequins, rhinestones, or metallic threads, will truly transform your fabric butterfly into a dazzling masterpiece. Embrace your creativity by carefully choosing elements that add depth and brilliance.
Consider these options to elevate your design:
- Sequins: Ideal for adding a reflective shimmer, giving your butterfly a lifelike iridescence.
- Rhinestones: Perfect for creating focal points, they mimic the sparkle of dew on a butterfly’s wings.
- Metallic Threads: Use these to outline wings or create intricate patterns, adding a touch of opulence.
- Glitter Fabric Paint: A versatile choice for painting delicate details, it adds both color and sparkle.
Each choice brings its own unique flair, ensuring your butterfly is both innovative and eye-catching.
Attach Decorative Elements
Begin by meticulously positioning your chosen sparkling accents on the fabric butterfly’s wings, ensuring each embellishment enhances the overall design.
Use tweezers for precise placement, aligning each piece symmetrically or in an artistic pattern. Secure them with fabric glue, and press gently to adhere.
To inspire your creative process, consider the table below showcasing various embellishment options:
| Embellishment Type | Placement Area | Application Method |
|---|---|---|
| Rhinestones | Wing Edges | Fabric Glue, Tweezers |
| Sequins | Wing Centers | Needle & Thread |
| Beads | Body | Fabric Glue, Small Brush |
Allow each piece to dry thoroughly, ensuring a durable attachment. This step transforms your fabric butterfly into a shimmering masterpiece, reflecting your innovative flair.
Stuff the Butterfly
Carefully fill the butterfly’s wings and body with soft stuffing, ensuring that each section is evenly plumped without overfilling, so the fabric maintains its shape and flexibility.
Use small amounts of stuffing at a time, delicately pushing it into the farthest corners with a chopstick or a similar tool.
This method provides control and precision, preventing lumps and uneven surfaces. Your goal is to create a smooth, lifelike appearance.
- Start with the wing tips, gradually moving toward the body.
- Rotate the butterfly, frequently checking for symmetry.
- Use high-quality polyester fiberfill for a plush finish.
- Massage the stuffed areas gently to distribute the filling evenly.
Close the Opening
To close the opening, use a needle and thread to stitch the fabric edges together with small, precise stitches. Make sure you secure your work by tying a hidden knot at the end, ensuring a seamless finish.
This will give your fabric butterfly a polished and professional look.
Stitch the Fabric Edges
With the butterfly now taking shape, use a needle and thread to meticulously stitch the fabric edges, closing the opening securely. Guarantee each stitch is small and tight to maintain the delicate aesthetic of your butterfly.
Follow these steps for a seamless finish:
- Align the edges: Carefully match up the fabric edges to avoid any misalignment.
- Thread your needle: Use a thread color that blends well with your fabric to keep stitches discreet.
- Begin stitching: Start at one corner, using a ladder stitch for an almost invisible seam.
- Check tension: Make sure your stitches aren’t too loose or too tight to keep the fabric smooth.
Secure With Hidden Knot
Once you’ve stitched the edges, it’s crucial to secure the seam with a hidden knot, guaranteeing your butterfly retains its elegant form. Thread your needle with a matching thread, making a small knot at the end.
Insert the needle inside the opening, bringing it out through the seam. Pull the thread taut, then slip the needle back into the same spot, creating a tiny loop.
Pass the needle through this loop and pull tight, creating a secure, almost invisible knot. Repeat this process for extra strength.
Shape the Butterfly
Start by carefully folding the fabric in half to create a symmetrical base for your butterfly’s wings. Precision here guarantees your butterfly looks balanced and appealing.
Next, follow these steps to shape the wings:
- Crease the Fold: Press firmly along the fold to create a sharp crease that will serve as the butterfly’s spine.
- Wing Curves: Gently curve the edges outward to form the natural arc of butterfly wings.
- Pinch and Gather: Pinch the center of the fold and gather the fabric slightly to add texture and dimension.
- Define Edges: Use a fabric pen to lightly outline the wing shapes, ensuring both sides are even.
Your butterfly’s wings are now taking shape, ready for the final touches.
Final Touches
To complete your fabric butterfly, add intricate details such as antennae and decorative stitching to enhance its charm and realism.
Start by using thin wire or embroidery floss to create delicate antennae, attaching them securely to the butterfly’s head.
Next, employ decorative stitching techniques like satin stitches or French knots to mimic the delicate patterns found on real butterfly wings. Consider using metallic or variegated threads for a modern twist. You can also sew on tiny beads or sequins to add a touch of sparkle.
Conclusion
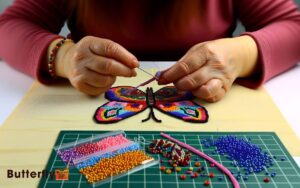
Creating a fabric butterfly is like planting a garden every stitch is a seed, and with patience, it blossoms into something beautiful. With each carefully placed bead and delicate thread, the design comes to life, capturing the essence of a real butterfly. Learning how to make a beaded butterfly requires precision and creativity, allowing you to experiment with colors and patterns. As you sew, the butterfly takes shape, transforming fabric and beads into a stunning handmade piece.
Remember, no two butterflies are alike, just as your creations will be uniquely yours.
As you sew, think of each thread as a connection to your creativity. With practice, you’ll see your butterflies take flight, bringing color and joy to wherever they land.
Now, gather your materials and let your imagination soar!

