How To Make A Balloon Animal Butterfly? Easy Guide!
Creating a balloon animal butterfly will spark joy and impress your friends! Start with colorful 260Q balloons and leave 3-4 inches uninflated.
Twist an inch from the nozzle to begin. Shape large loops for the upper wings and smaller loops for the lower wings, securing each twist. Twist the center to form a cute body.
Use a small, thin balloon to craft V-shaped antennae for added charm. Draw delicate patterns or add glitter for a magical finish. Ready to explore more intricate details and tips for perfection?

Key Takeaways
Materials Needed
To start a mesmerizing balloon animal butterfly, you’ll need a handful of essential materials that guarantee your crafting experience is smooth and enjoyable.
- First, grab a high-quality balloon pump; it’s your best friend for inflating balloons effortlessly.
- Next, gather a selection of 260Q balloons in vibrant colors—ideally, pick shades that mimic a butterfly’s natural beauty, like bright yellows, blues, and pinks.
- Don’t forget a pair of sharp scissors for precise trimming and a permanent marker to add those intricate details that bring your butterfly to life.
- Finally, keep a small bottle of baby powder handy; it helps reduce friction, making twists and turns a breeze.
With these materials, you’re set to commence an innovative balloon artistry adventure!
Inflate the Balloon
Now, let’s bring your butterfly to life by inflating the balloon!
- Pick a vibrant balloon that will transform into stunning wings.
- Make sure you inflate it to just the right size, leaving a bit of the end uninflated.
Choose Balloon Type
Selecting the perfect balloon for your butterfly creation sets the stage for a vibrant and enchanting masterpiece.
You’ll want to choose a high-quality, 260Q balloon, known for its durability and versatility. These balloons come in a plethora of vivid colors, so don’t forget to mix and match!
For a butterfly, consider using bright, contrasting hues to make your design pop. Think neon pinks paired with electric blues, or sunshine yellows with deep purples. The 260Q’s flexibility allows for intricate twists and turns, essential for crafting those delicate wings and antennae.
When inflating, make sure you leave enough uninflated space at the end. This will give you the control you need to shape your balloon with precision and flair.
Proper Inflation Technique
Mastering the art of proper inflation is the first step to guaranteeing your butterfly balloon creation is both sturdy and stunning. Start by choosing a high-quality balloon pump for consistent results.
As you inflate, leave about 3-4 inches uninflated at the end to allow room for twisting without popping. Make sure the balloon is firm yet flexible.
Here’s what to keep in mind:
- Pressure control: Avoid over-inflation to prevent bursting.
- Consistent inflation: Aim for even air distribution to make twisting easier.
- Balloon type: Use a 260 balloon for ideal size and shape.
- Safety first: Keep sharp objects away to avoid accidents.
Get ready to bring your balloon butterfly to life with these inflation tips, setting the stage for a beautiful creation!
Knotting the Balloon
With your balloon properly inflated, it’s time to secure it with a sturdy knot to set the stage for your butterfly masterpiece. Grab the neck of the balloon and begin the process by securing it with a tight knot to prepare for your butterfly masterpiece.
Grasp the end of the balloon and twist it a few times. Loop it through itself, pulling firmly to guarantee it won’t come undone. The knot should be snug but not overly tight, maintaining the balloon’s shape and flexibility.
Here’s a quick recap of the steps:
| Step | Action | Detail |
|---|---|---|
| 1 | Twist End | Twist 2-3 times |
| 2 | Loop Through | Create a loop |
| 3 | Pull Tight | Secure snugly |
Now, you’re ready to shape the balloon into a stunning butterfly. Let’s move on to the next steps!
Make the First Twist
Grab the balloon near the nozzle and give it a confident twist to kickstart your butterfly creation. This simple motion locks in the air and forms the first part of the wings. Next, carefully bend and shape the balloon to create symmetrical loops, ensuring a balanced design. For more detailed steps, refer to the butterfly gift box instructions to perfect your creation.
This pivotal twist sets the foundation for your masterpiece, sparking the transformation from a simple balloon to an enchanting butterfly. Make certain that your twist is firm yet gentle, preventing any unwanted popping.
Here’s what to keep in mind:
- Begin: Make sure the twist is about an inch from the nozzle.
- Guarantee: Aim for even twists to maintain a balanced butterfly.
- Grip: Hold the twisted section tightly so it doesn’t unravel.
- Flow: Let your hands move fluidly to maintain control.
With this twist, you’re not just shaping a balloon; you’re commencing an artistic journey. Embrace the process and watch your butterfly take flight!
Form the Butterfly Wings
Now comes the magical part where your creation truly takes flight!
- Shape the balloon into graceful wing loops, imagining the delicate flutter of a butterfly as you twist.
- Secure the structure firmly, ensuring the wings stand proud and ready to enchant.
Shape Wing Loops
Shaping the wing loops brings your balloon butterfly to life, and you’ll feel a rush of excitement as you see its delicate wings begin to form.
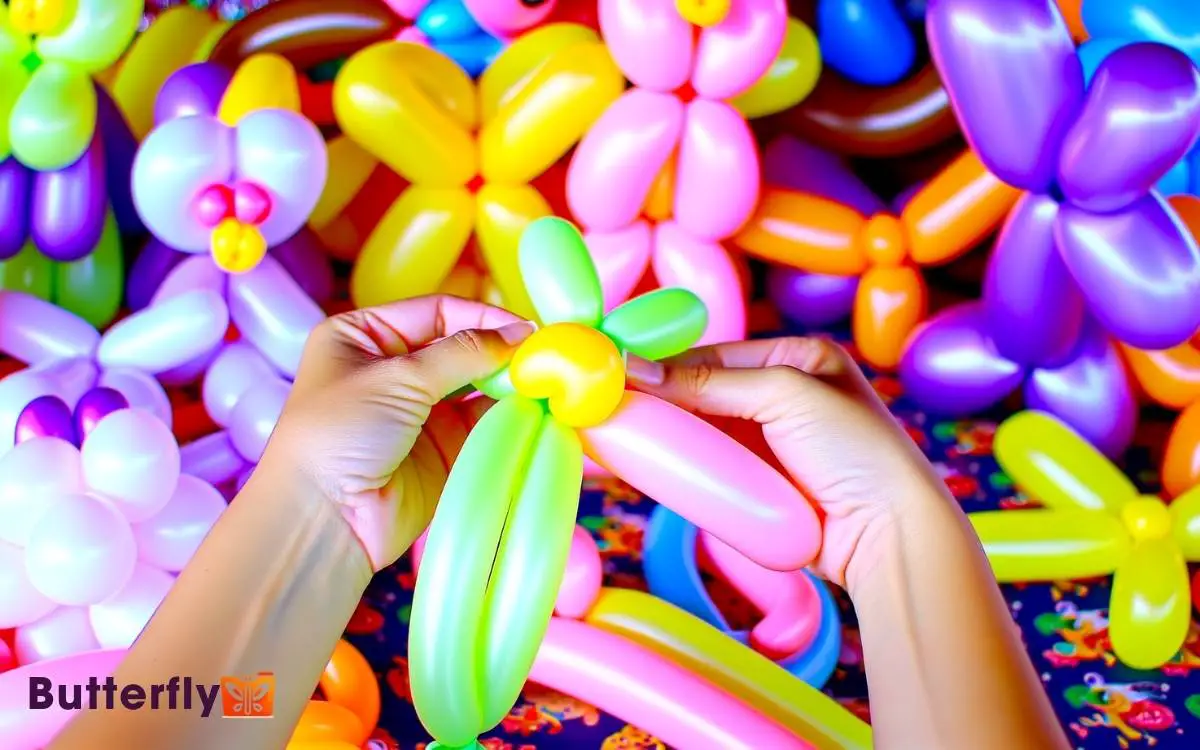
Start by creating two large loops on either side of the balloon to represent the upper wings.
Next, make two smaller loops beneath them for the lower wings, giving your butterfly a realistic and dynamic appearance.
Remember to:
- Twist carefully: Guarantee each loop is secure without over-twisting.
- Maintain symmetry: Keep both sides even for a balanced look.
- Adjust proportions: Make sure the upper and lower wings are proportionate.
- Visualize the final shape: Picture how the wings will look when completed.
With each twist and turn, your balloon butterfly’s wings will take shape, fluttering with your creative energy!
Secure Wing Structure
With your wing loops ready, it’s time to secure them into place, ensuring your balloon butterfly has a sturdy and elegant wing structure.
First, pinch the base of each loop, and twist them together gently but firmly. This twist will lock the wings into a cohesive frame.
Now, take the neck of the balloon where you inflated it and wrap it around the twisted center, binding everything securely.
Feel free to adjust the wings for symmetry, making sure they’re even and beautifully aligned. Imagine your butterfly fluttering with grace and precision.
You’re not just crafting a balloon animal; you’re sculpting an airborne masterpiece. Embrace the process, let your creativity soar, and watch as your balloon butterfly takes elegant shape before your eyes!
Create the Body
Grasping the balloon firmly, twist the center to form the butterfly’s vibrant body, making sure it’s both sturdy and symmetrical. This bold twist is where your artistic touch shines.
The body serves as the anchor for all other features, so make sure it’s flawless. Imagine this as the centerpiece that holds your entire creation together.
To achieve the perfect body:
- Grip tightly: Guarantee no air escapes during the twist.
- Twist decisively: A strong, confident twist will prevent the body from unraveling.
- Check symmetry: Both sides should mirror each other precisely.
- Stabilize the twist: Gently press and hold the twist for a few seconds to secure.
With these steps, you’ve sculpted a robust foundation for your butterfly, ready for the next magical elements.
Add Antennae
Now it’s time to bring your butterfly to life by crafting its delicate antennae, adding a whimsical touch to your creation.
Grab a small, thin balloon, perhaps a 160Q or a scrap piece, and inflate it just a bit. Twist the inflated section into two equal parts, forming a V-shape. These will be the charming antennae that complete your butterfly’s look.
Secure the base of the V to the top of the butterfly’s head with a gentle twist, ensuring they stand tall and proud. You can even curl the tips slightly for added flair.
This final touch transforms your balloon butterfly from just another creation into a delightful, enchanting masterpiece, ready to flutter into the hearts of your audience.
Secure the Structure
To guarantee your balloon butterfly remains intact and sturdy, you’ll want to double-check all the twists and connections for a flawless finish. This step guarantees your creation won’t lose its shape or deflate prematurely.
Here’s how to secure the structure effectively:
- Reinforce Twists: Revisit each twist, making sure it’s tight. Loose twists can unravel easily.
- Lock Connections: Twist sections together to lock them in place. This prevents any unexpected movement.
- Check for Leaks: Gently squeeze the balloon to detect any air leaks. Patch them immediately to avoid deflation.
- Balance Wings: Ensure both wings are symmetrical and balanced for a visually appealing butterfly.
Finishing Touches
With your balloon butterfly securely crafted, adding the final artistic touches will truly make it flutter to life.
- First, grab a permanent marker and draw intricate patterns on the wings. Think swirls, dots, and lines let your imagination soar!
- Next, consider adding adhesive gems or glitter for a sparkling effect that catches the light beautifully.
- You can also twist a small balloon into antennae, attaching them to the butterfly’s head for added realism.
- Finally, a gentle mist of balloon-safe spray will give it a glossy finish, making it look even more vibrant.
Conclusion
You’ve gracefully given life to a beautiful balloon butterfly! With twists and turns, you’ve transformed simple supplies into a splendid spectacle.
Now, your colorful creation can captivate, charm, and cheer anyone who sees it. Don’t let this be the last of your balloon adventures keep creating, keep crafting, and let your imagination soar sky-high.
Remember, every balloon animal born from your hands is a proof of your talent and tenacity. Keep twisting, and happy crafting!


