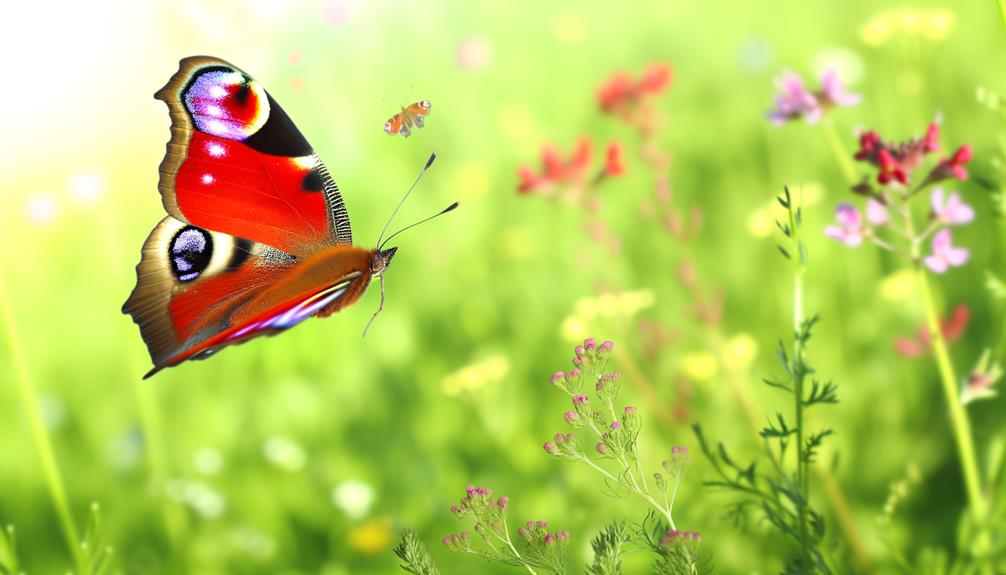
7 Steps to Drawing a Stunning Peacock Butterfly
Drawing a peacock butterfly involves a meticulous, step-by-step process beginning with gathering quality materials, including a range of pencils, acid-free sketch paper, and high-resolution reference images. Start by lightly sketching the basic shapes: an elongated oval for the body and triangular forms for the wings.
Outline the wings with care to capture their scalloped patterns, guaranteeing symmetry. Add distinctive eyespots and fine veins to enhance realism, then apply vibrant colors, starting with blues and purples, blending into reds and oranges.
Final touches with fine details and color vibrancy will guarantee a lifelike depiction. For more thorough insights, consider the subsequent stages.
Key Takeaways
- Lightly sketch basic shapes for the butterfly's body and wings to create a symmetrical foundation.
- Refine wing outlines, ensuring accurate curvature and scalloped patterns for realistic contours.
- Add eyespots and veins using concentric circles and interconnected lines for detailed wing patterns.
- Apply rich, blended colors starting with deep hues and building intensity for realistic vibrancy.
Gather Your Materials
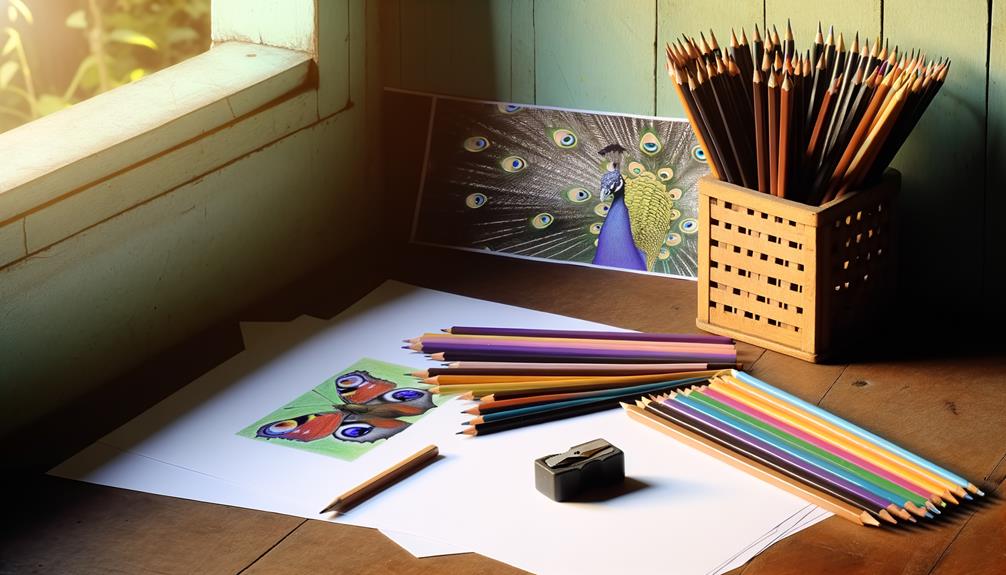
To begin your drawing of a peacock butterfly, make sure you have a set of high-quality pencils, erasers, sketch paper, and reference images readily available.
Opt for a range of pencils, from H to 6B, to achieve varying line weights and shades. A kneaded eraser will allow for precise corrections without damaging the paper.
Choose acid-free sketch paper to guarantee durability and texture compatibility with your pencils. High-resolution reference images are essential for capturing the intricate patterns and vibrant colors of the peacock butterfly.
Thorough preparation of these materials will facilitate a smooth and accurate drawing process, enabling you to focus on technique and detail, ultimately enhancing the quality of your finished artwork.
Sketch Basic Shapes
Begin by lightly sketching the fundamental shapes of the peacock butterfly, such as an oval for the body and symmetrical, gently curved forms for the wings, ensuring accurate proportions and alignment. This foundational structure is critical for achieving a balanced and aesthetically pleasing composition.
To evoke a sense of accomplishment and precision, consider the following steps:
- Body: Draw an elongated oval for the butterfly's body, keeping it centered to maintain symmetry.
- Wings: Sketch large, rounded triangles for the forewings, and smaller, similarly shaped forms for the hindwings.
- Antennae: Add two delicate, curved lines extending from the head, capturing the elegance of the butterfly's sensory organs.
These initial shapes will guide your detailed work, setting a solid groundwork for the subsequent steps.
Outline the Wings
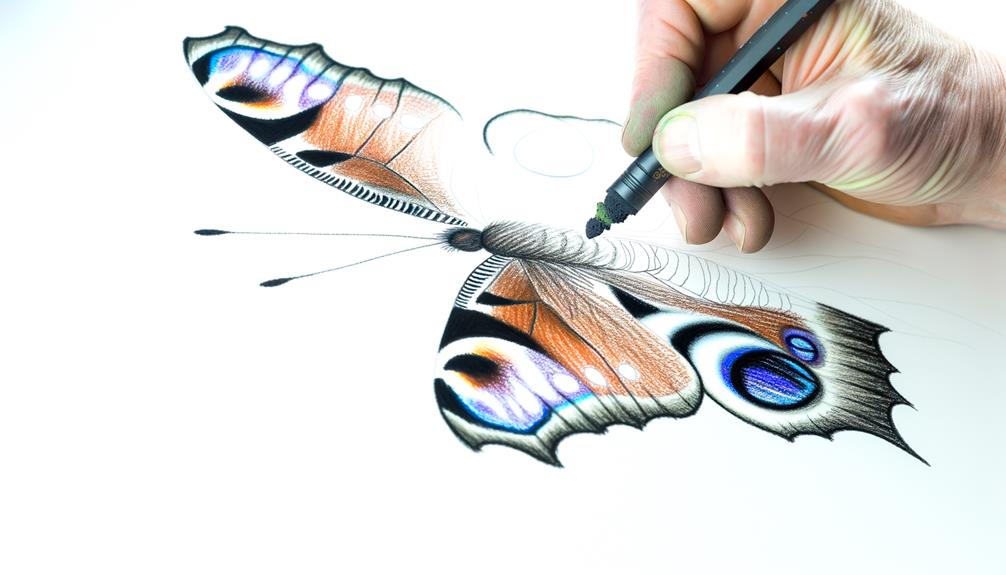
With the basic shapes established, meticulously trace the outer edges of the wings, refining their contours and capturing the intricate, scalloped patterns characteristic of the peacock butterfly. Pay close attention to the curvature and symmetry of the wings, guaranteeing each fold and indentation is accurately depicted. Utilize light, controlled strokes to craft the delicate wing structures, maintaining a steady hand to avoid unnecessary deviations.
Here is a quick reference table for key wing features:
| Feature | Description |
|---|---|
| Upper Wing Curvature | Smooth, slightly curved edges |
| Lower Wing Scallops | Pronounced, wavy patterns |
| Wing Tips | Rounded with slight elongation |
| Inner Wing Angle | Sharp, defining the separation of upper and lower |
| Wing Span Symmetry | Both wings mirror each other precisely |
This level of detail guarantees a realistic and accurate representation.
Add Butterfly Patterns
The intricate patterns of the peacock butterfly's wings, characterized by their vibrant eyespots and complex color gradients, demand careful attention to detail and precision.
To accurately represent these elements, follow these steps:
- Outline the Eyespots: Begin by sketching the prominent eyespots on the wings. These should be strategically placed, with each eyespot comprising concentric circles varying in size.
- Define Veins and Borders: Add the network of veins that run across the wings, ensuring they interconnect seamlessly and enhance the structural realism.
- Incorporate Texture: Carefully draw the fine textures and small patterns between the eyespots and veins. These details contribute to the overall authenticity of the butterfly.
Enhance With Colors

To bring the peacock butterfly to life, meticulously apply a rich palette of colors, starting with the deep blues and purples for the eyespots and gradually blending into the vibrant reds, oranges, and yellows of the surrounding wing areas.
Utilize a fine-tip brush or colored pencils to guarantee precision in the intricate patterns. Pay close attention to the gradient shifts, guaranteeing smooth blending to mimic the natural iridescence of the butterfly's wings.
Layering is key; apply lighter shades first, then build up intensity with darker tones. Maintain color harmony by using complementary hues, which will enhance the realism.
This detailed approach to coloring will imbue your peacock butterfly with authenticity and vividness, capturing its true essence.
Final Touches
In the final touches, focus on adding fine details such as the intricate patterns on the butterfly’s wings and subtle texturing to its body, which bring the drawing to life. Pay close attention to the highlights and shadows, as they enhance the realism and depth of the artwork. For a blue morpho butterfly drawing, carefully blend different shades of blue to capture the butterfly’s iridescent wings. Finally, refine the edges and add any last-minute touches to ensure a polished and lifelike result.
Additionally, enhancing color vibrancy through strategic layering and blending techniques will guarantee the peacock butterfly's hues are rich and realistic.
These meticulous adjustments refine the overall composition, transforming your artwork into a strikingly vivid representation.
Adding Fine Details
With a fine-tip brush or pen, delicately enhance the intricate patterns on the butterfly's wings, ensuring each dot and line contributes to the natural symmetry and vivid realism.
Pay close attention to the following:
- Vein Detailing: Emphasize the delicate veins, tracing them with gentle, controlled strokes to highlight the wing's structure.
- Eye Spots: Carefully define the eye spots, ensuring their concentric circles are crisp and proportionate, capturing the butterfly's mesmerizing gaze.
- Edge Accents: Add subtle, fine lines along the wing edges to create a textured effect, mimicking the natural scalloping.
Each detail should be rendered with precision to evoke the delicate beauty of the peacock butterfly, ensuring your illustration achieves an elevated level of lifelike accuracy and visual impact.
Enhancing Color Vibrancy
Achieving the final touches of color vibrancy requires the strategic use of layering translucent washes and applying selective highlights to bring the peacock butterfly's wings to life.
Begin by applying a thin, translucent wash of complementary colors over the base hues to create depth and richness. Gradually build up the layers, allowing each to dry thoroughly before adding the next.
For highlights, utilize a fine-tipped brush and a slightly opaque, lighter shade to accentuate the intricate patterns and iridescent spots. Pay close attention to the natural light sources in your reference image, ensuring shadows and highlights are consistent.
Conclusion
The meticulous process of drawing a peacock butterfly, from gathering materials to adding the final touches, requires a keen eye for detail and a steady hand.
As the vivid colors and intricate patterns come to life on paper, the transformation is nothing short of mesmerizing.
The culmination of these efforts results in an artwork that captures the ethereal beauty of the butterfly, leaving one to ponder—could this be a mere illustration, or has nature itself been encapsulated within the confines of the canvas?