How To Cut A Butterfly Out Of Paper? Step-by-Step Guide!
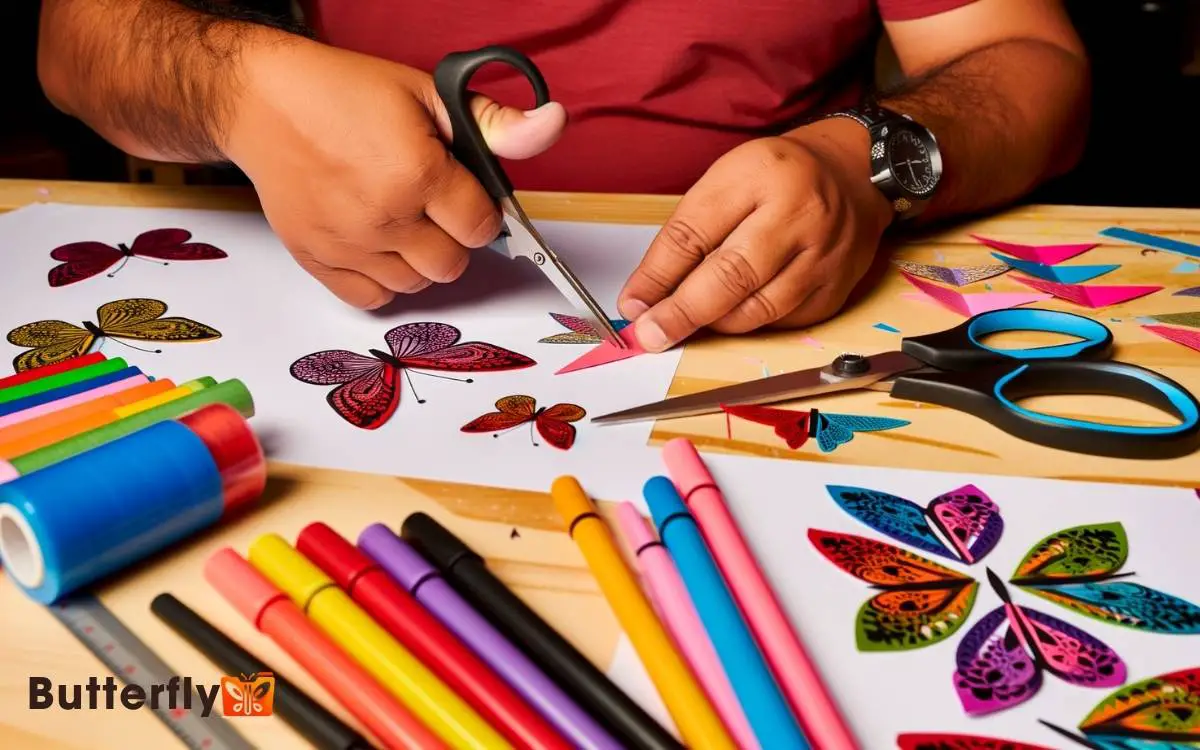
Start by gathering sharp scissors, a pencil, eraser, ruler, and adhesive. Choose your paper cardstock, vellum, or even recycled paper works well.
Unfold your paper to reveal a symmetrical butterfly. Add details using markers, watercolor paints, or glitter glue.
Finally, display your beautiful creation on windows, gift toppers, or create a mobile with multiple butterflies. Continue these steps to explore creative techniques and enhance your paper crafting skills.

Key Takeaways
Gather Your Materials
To get started on your paper butterfly, you’ll need to gather a few essential materials.
- First, grab a pair of sharp scissors to guarantee clean, precise cuts.
- Next, find a pencil for sketching your butterfly design; mechanical pencils work best for fine lines.
- You’ll also need an eraser to correct any mistakes. A ruler will help keep your design symmetrical.
- Don’t forget adhesive options like glue sticks or double-sided tape for any decorative elements.
- Lastly, clear some workspace to keep your tools and paper organized.
Choose Your Paper
Now that you’ve gathered your materials, it’s time to choose the right paper for your butterfly.
Consider the type, color, and texture to bring your creation to life. Don’t be afraid to experiment with different options to find what suits your vision best.
Paper Type Options
Selecting the right paper for your butterfly cutout is essential to achieving a beautiful and durable result. Start by considering cardstock; its thickness and sturdiness make it perfect for intricate designs.
If you prefer a delicate appearance, try using vellum. This translucent paper adds an ethereal quality to your butterfly.
For an eco-friendly option, recycled paper is a great choice, offering both sustainability and unique textures. Origami paper is another excellent option, specifically designed for folding and cutting, ensuring crisp, clean lines.
Don’t overlook the versatility of printer paper it’s readily available and easy to work with, especially for beginners. Each paper type offers distinct advantages, so choose the one that best aligns with your creative vision.
Color and Texture
When choosing the color and texture of your paper, consider how these elements will enhance the overall aesthetic and impact of your butterfly cutout. Opt for vibrant, contrasting colors to make your butterfly pop or go for pastel shades for a more subtle, elegant look.
Experiment with textured papers like handmade or embossed sheets to add a tactile dimension that catches the eye. Metallic or glitter paper can bring a sense of whimsy and sparkle, perfect for innovative, standout designs.
Don’t be afraid to mix and match different textures and colors to create a truly unique butterfly. Remember, your choice of paper can transform a simple cutout into a compelling piece of art, reflecting your creativity and attention to detail.
Fold the Paper
With your piece of paper in hand, carefully fold it in half to create a crisp, clean edge. This fold will be the symmetrical axis for your butterfly, ensuring both wings are perfectly aligned. Precision here is key, so take your time to align the edges perfectly.
To achieve the best results:
- Align the corners: Make sure the corners match up exactly.
- Press firmly: Run your finger or a ruler along the fold to make it sharp.
- Check for wrinkles: Smooth out any creases for a flawless finish.
- Secure the fold: A quick press with a book can keep it intact.
Draw the Butterfly
Now it’s time to draw your butterfly. Choose a design that you love and fold the paper correctly to guarantee symmetry. Carefully outline half of the butterfly shape along the fold to guide your cutting later.
Choose Butterfly Design
To start, gather your materials and select a butterfly design that sparks your creativity and matches your skill level. Whether you’re a novice or an expert, picking the right template is essential.
Consider these elements:
- Complexity: Choose a design that aligns with your experience. Simple shapes work best for beginners.
- Symmetry: Guarantee the wings are symmetrical for an authentic look.
- Size: Decide how large or small you want your butterfly to be.
- Details: Determine the level of intricacy you’re comfortable cutting out.
Once you’ve chosen your design, sketch it lightly onto your paper. Use a pencil for easy adjustments. This process sets the foundation for a beautiful, innovative butterfly that’s uniquely yours.
Don’t rush take your time to perfect your drawing.
Fold Paper Correctly
Carefully fold your paper in half, ensuring the edges align perfectly to create a crisp, clean crease. This essential step is important, as it forms the foundation for your butterfly’s symmetry.
Hold the folded paper steady and press down firmly along the fold to solidify it. Once you’ve achieved a sharp crease, keep the paper folded. It’s now ready for the drawing phase.
Place the folded edge on your left side. This orientation helps maintain the butterfly’s symmetry when you cut it out later. Use a pencil for sketching, as it allows for easy adjustments. Be methodical and patient, allowing your creativity to guide you.
This careful folding and positioning set the stage for a beautifully symmetrical butterfly.
Outline Symmetrical Shape
Begin by sketching half of the butterfly’s outline along the folded edge of your paper, making sure the design is both intricate and balanced.
This step is important because once you unfold the paper, both wings will mirror each other perfectly. Use a pencil to lightly draw, allowing for adjustments as needed.
- Shape: Start with a rounded upper wing, tapering to a smaller lower wing.
- Details: Add curves and edges to create a natural, lifelike appearance.
- Symmetry: Guarantee both halves will match once cut and unfolded.
- Refinement: Continuously refine your lines for precision.
Don’t rush this process. Embrace the creative freedom to innovate and craft a butterfly that’s uniquely yours.
Cut Out the Shape
With your scissors in hand, align them along the marked outline of the butterfly and make deliberate, smooth cuts to bring your paper creation to life. Take your time to follow the curves precisely, ensuring clean edges that enhance the butterfly’s delicate shape. As you refine your cutting technique, you might notice similarities to learning how to cut butterfly bangs, where precision and smooth, flowing cuts are key. Once finished, gently unfold or adjust your paper butterfly to showcase its symmetrical beauty.
Start at one edge and follow the lines carefully. Use long, fluid motions to avoid jagged edges. It’s important to maintain a steady hand and focus on cutting precisely along the guide.
If the design has intricate details, take your time and use the tips of the scissors for better control. Remember, patience is key.
Feel free to rotate the paper instead of your scissors to achieve cleaner curves. By the end, you’ll have a beautifully cut butterfly, ready to amaze with its symmetry and elegance.
Keep pushing your creative boundaries!
Unfold the Paper
Gently open the folded paper to reveal the symmetrical beauty of your butterfly design. As you carefully unfold, take a moment to appreciate the intricate patterns you’ve created.
This is where the magic happens, transforming a simple piece of paper into a delicate work of art.
- Check for Clean Edges: Make sure all cuts are smooth and precise.
- Flatten the Creases: Use your fingers to gently press out any folds.
- Inspect for Symmetry: Confirm that both wings mirror each other perfectly.
- Adjust if Necessary: Make minor tweaks to perfect your butterfly.
Unfolding is an important step that brings your vision to life. Embrace this moment of revelation, knowing you’re one step closer to your innovative masterpiece.
Add Details
Now, bring your butterfly to life by adding intricate details that highlight its wings and body.
- Start by sketching delicate patterns on the wings using a pencil. Think of swirls, dots, or geometric shapes that mimic real butterfly wings.
- Use a fine-tip pen to trace over your pencil lines for clarity.
- Don’t forget the body; draw a segmented abdomen and antennae.
- Enhance the veins on the wings for a realistic touch.
- If you’re feeling adventurous, experiment with cutting tiny slits or holes to create a lace-like effect.
- Be precise and patient. Each detail you add will make your butterfly more enchanting and lifelike.
- Your creativity can transform a simple cut-out into a stunning, innovative masterpiece.
Decorate the Butterfly
After meticulously adding details to your butterfly, it’s time to let your creativity soar by decorating it with vibrant colors and textures.
Start by selecting a palette that reflects your vision. You can use a variety of materials to bring your butterfly to life.
Here are some innovative ideas to get you started:
- Watercolor paints for a delicate, blended look.
- Glitter glue to add a shimmering effect to the wings.
- Marker pens for bold, defined patterns.
- Tissue paper for creating a layered, three-dimensional texture.
Use these materials to highlight the intricate details you’ve crafted, enhancing the beauty of your butterfly. Experiment with different combinations and techniques to make your creation truly unique.
Display Your Creation
Once you’ve finished decorating, proudly display your butterfly in a spot where it can be admired and add a touch of whimsy to your space. Attach your butterfly to a window using clear adhesive dots to let the light shine through.
Create a mobile by hanging multiple butterflies from a wooden hoop with fishing line, allowing them to dance in the breeze. For a unique wall display, arrange your butterflies in a shadow box for a three-dimensional effect.
You could even use them as gift toppers for a personalized touch. Each method showcases your creativity and innovation, transforming a simple paper craft into an inspiring piece of decor.
Don’t hesitate to experiment and find the perfect display that reflects your style.
Conclusion
You’ve successfully crafted a beautiful paper butterfly. Remember, ‘practice makes perfect,’ so don’t hesitate to make more and refine your skills.
Each fold and cut brings you closer to mastering this delightful art. Now, take a moment to proudly display your creation. Whether it’s on a bulletin board or as a gift, your butterfly will surely bring joy and color to any space.
Keep creating and let your imagination soar. Happy crafting!


