How Do You Draw a Monarch Butterfly? Step-by-Step Guide!
To draw a monarch butterfly, start with high-quality sketch paper, a range of graphite pencils (2H to 6B), a fine-tip eraser, and a ruler.
Sketch the body using a 2H pencil, beginning with an oval thorax and adding the abdomen. Add circles for the head and draw a vertical guideline.
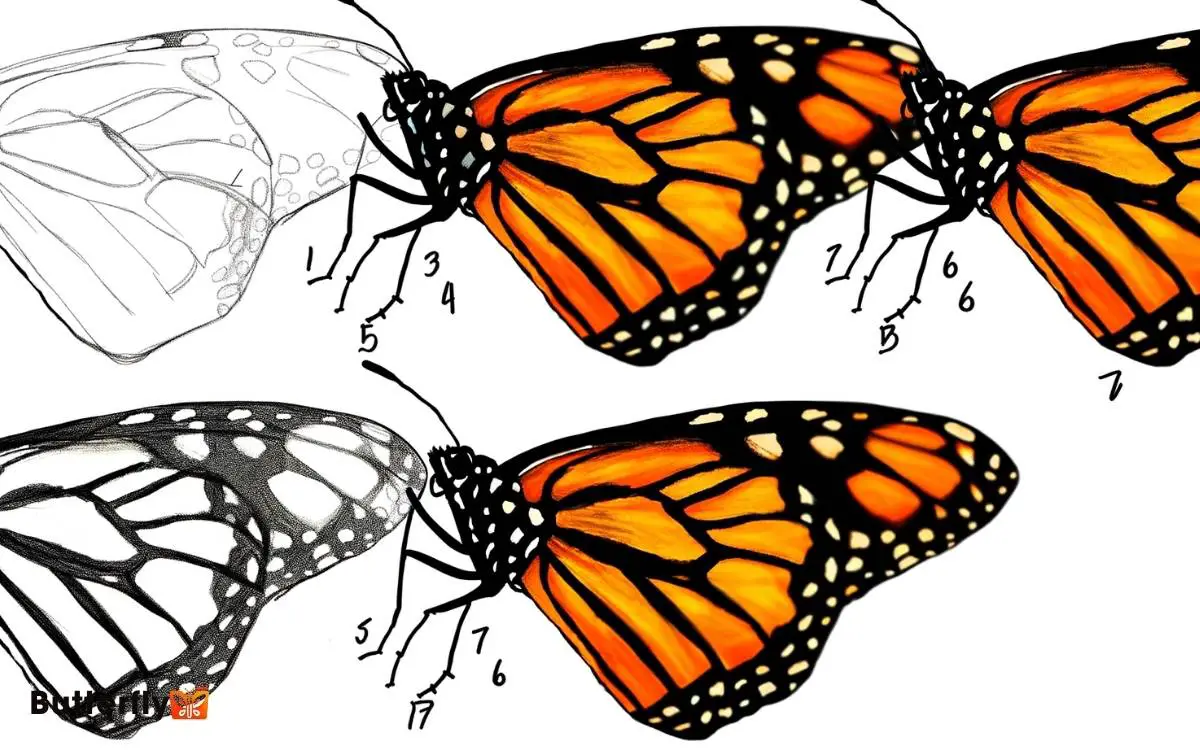
For the wings, draw elongated triangles for forewings at a slight upward angle and overlapping triangles for hindwings. Outline the black veins (approximately 0.5 cm wide) and spots symmetrically.
Color the wings vibrant orange, leaving veins and spots black. Maintain subtle gradients for realism. Continue to discover detailed techniques.

Key Takeaways
Gathering Your Materials
To begin drawing a monarch butterfly, you’ll need to gather essential materials like high-quality sketch paper, a set of graphite pencils ranging from 2H to 6B, a fine-tip eraser, and a ruler for precise measurements.
High-quality sketch paper guarantees your pencil strokes appear smooth and refined.
Graphite pencils from 2H to 6B offer varying degrees of hardness and darkness, crucial for capturing intricate details and shading.
Use a fine-tip eraser for correcting minor errors without smudging. The ruler will help you achieve accurate proportions and symmetry, crucial in replicating the butterfly’s natural elegance.
Make sure your workspace is well-lit to see the fine details clearly. Proper tools and setup are imperative for an accurate and lifelike rendering.
Sketching the Outline
With your materials ready, start by lightly sketching the monarch butterfly’s body using a 2H pencil, guaranteeing the proportions are accurate by measuring the length and width with your ruler. The body should be approximately 2.5 cm long and 0.6 cm wide.
Begin with an oval shape for the thorax, then add the abdomen, which tapers down slightly. Position two small circles at the top for the head, about 0.3 cm in diameter. Make sure your lines are faint so they can be easily adjusted later.
Observe the symmetry of the butterfly by drawing a vertical guideline down the center. This will help you maintain balance in your sketch. Accurate outlines are essential for capturing the monarch’s distinctive form.
Drawing the Wings
Next, sketch the forewings by extending two elongated triangles from the thorax. Each triangle should measure approximately 5 cm in length and 3 cm in width at the widest point.
Guarantee the base of each triangle connects seamlessly to the thorax, creating a natural flow. Position the triangles at a slight upward angle to mimic the butterfly’s natural wing posture.
Now, draw the hindwings by adding two additional triangles beneath the forewings. These should measure about 4 cm in length and 3 cm in width. The hindwings should overlap slightly with the forewings, creating a layered effect.
Pay close attention to the curvature along the outer edges, as this adds authenticity to your drawing. Make sure the tips are gently rounded.
Adding Patterns
Begin by outlining the distinctive black veins that branch out symmetrically across each wing, ensuring they measure approximately 0.5 cm in width for accurate portrayal.
Observe the veins, noting their bifurcation points, where they split and extend towards the wing margins. Each primary vein should connect to smaller, secondary veins, creating a network-like pattern.
Next, delineate the marginal cell spots near the wing edges. These small, oval-shaped spots should be uniformly spaced and measure about 0.3 cm in diameter. Pay close attention to their arrangement to maintain anatomical accuracy.
Coloring the Butterfly
To color the monarch butterfly accurately, start by applying a rich, vibrant orange to the main sections of the wings, leaving the outlined veins and spots uncolored.
Use a fine-tipped brush or marker for precision. The orange regions should cover approximately 70% of each wing’s surface area.
Next, fill in the veins with a deep black, ensuring sharp, clean lines. The black spots, varying in diameter from 0.5 to 2 millimeters, should be added last, distributed evenly along the wing margins.
For realism, incorporate subtle gradients within the orange areas, shifting from a darker shade near the veins to a lighter hue towards the wing’s edge. This meticulous attention to detail will enhance the butterfly’s lifelike appearance.
Conclusion
By following these steps, you’ll create a detailed and accurate monarch butterfly illustration.
For example, when observing real monarchs, you’ll notice the forewings measure approximately 4.5-5.1 cm, which you can replicate in your drawing.
Remember, precise patterns and colors, like the distinctive black and orange, are essential for realism.
Practice regularly, and you’ll see significant improvement in capturing the monarch’s intricate beauty.
Your dedication to detail will surely yield scientifically accurate and visually stunning results.


