Make an Origami Swallowtail Butterfly in 7 Simple Steps
To create an origami swallowtail butterfly, start by gathering lightweight origami paper, a bone folder, and a flat workspace. Begin with a square paper, making diagonal creases to form an 'X' and horizontal and vertical folds to create a 'plus' sign.
Fold carefully to guarantee symmetry and sharp creases. Shape the wings using valley and mountain folds, confirming symmetry and neat folds.
For the body, fold the paper in half, then bring top corners down to form the head and bottom edges up to form the body. Adding intricate details and refining creases are essential to achieving a realistic model.
Continue for detailed guidance.

Key Takeaways
- Gather materials: origami paper, flat workspace, and bone folder for precise folds.
- Prepare your paper: ensure it is square, 15 cm x 15 cm, and free of imperfections.
- Fold the base: create 'X' and 'plus' sign creases for a symmetrical foundation.
- Shape the wings: use valley and mountain folds, ensuring symmetry and sharp creases.
Gather Your Materials
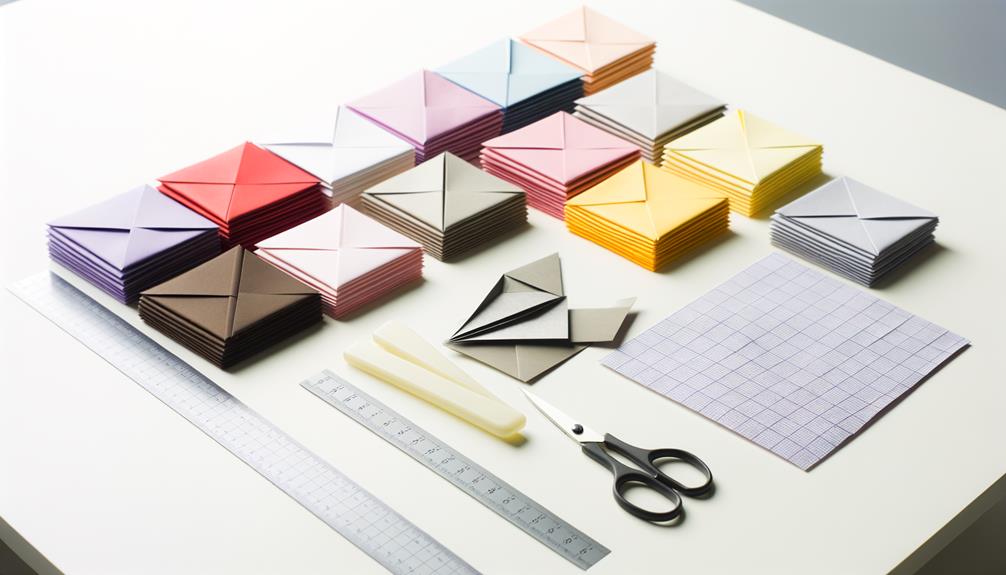
Begin by assembling the necessary materials, which include a square sheet of origami paper, a flat workspace, and a bone folder for crisp folds.
The choice of origami paper is paramount; opt for a lightweight yet durable type, preferably with a design or color that complements the elegance of the swallowtail butterfly.
A flat workspace guarantees precision in folding, allowing for greater control and accuracy.
The bone folder, a specialized tool, aids in achieving sharp, well-defined creases that are essential for the intricate details of the butterfly.
Having these materials at hand not only simplifies the process but also empowers you to create with confidence and precision, embodying the spirit of freedom and creativity inherent in the art of origami.
Prepare Your Paper
To initiate the preparation of your origami paper, carefully align it on your flat workspace to guarantee maximum precision in the subsequent folds. Confirm the paper is square and free of any creases or imperfections. The quality of your paper can greatly affect the final appearance of your origami butterfly, so choose a paper that is neither too thick nor too thin, ideally around 70-80 gsm. Below is a table that outlines the key considerations when preparing your origami paper.
| Aspect | Description | Recommendation |
|---|---|---|
| Paper Size | Dimensions of the paper | 15 cm x 15 cm |
| Paper Weight | Thickness of the paper | 70-80 gsm |
| Paper Texture | Surface feel of the paper | Smooth, non-glossy |
| Paper Color | Aesthetic appearance, can affect visual outcome | Single-color or patterned |
Confirm all edges are perfectly aligned to achieve the best results.
Fold the Base
With your paper meticulously prepared, the initial step in folding the base of the origami swallowtail butterfly involves creating a diagonal crease by folding the paper in half from corner to corner.
This diagonal fold sets the foundation for the intricate design ahead. Next, unfold the paper and repeat the process with the other two corners, forming an 'X' that will guide subsequent folds.
- Diagonal Fold: Align one corner with the opposite corner, creating a sharp crease.
- Unfold and Repeat: Mirror the diagonal fold with the remaining corners.
- Create 'X' Base: Guarantee both creases intersect at the paper's center, forming an 'X'.
This foundational step is critical for achieving the symmetrical beauty of the swallowtail butterfly. By carefully observing the caterpillar’s growth and providing the right host plants, enthusiasts can successfully raise a tiger swallowtail butterfly. Proper nutrition and habitat conditions ensure that the transformation from chrysalis to adult butterfly occurs smoothly. This attention to detail ultimately enhances the butterfly’s vibrant appearance and graceful flight.
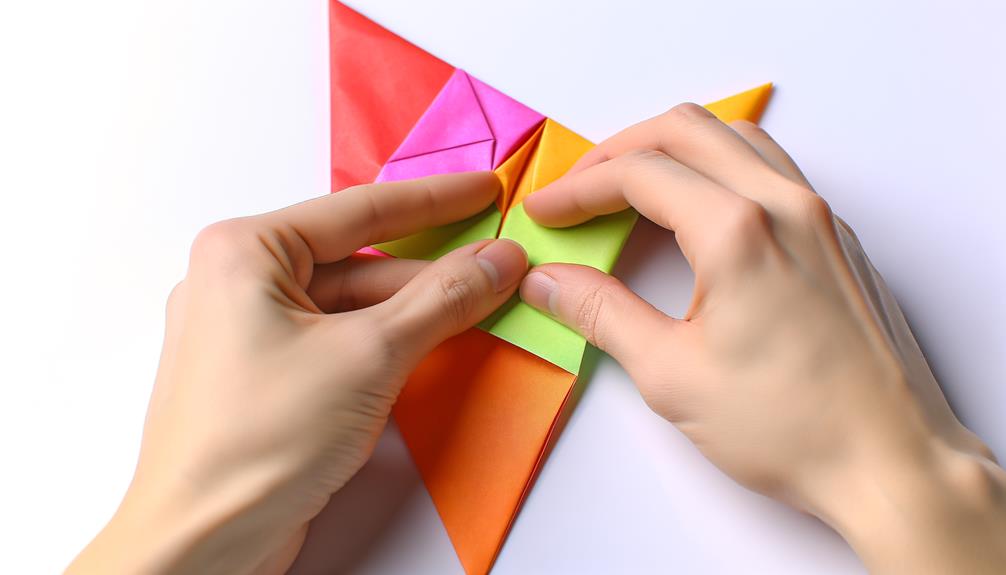
Shape the Wings
Shaping the wings of your origami swallowtail butterfly requires careful attention to wing folding techniques, which are essential for achieving the distinctive form.
Ensuring crease sharpness is vital, as it contributes to the structural integrity and aesthetic appeal of the butterfly.
Additionally, maintaining symmetry and balance throughout the folding process will result in a more realistic and visually pleasing final product.
Wing Folding Techniques
Mastering the intricacies of wing folding is essential for achieving the graceful contours characteristic of a Swallowtail butterfly in origami. Precision and attention to detail will guarantee that the wings reflect the butterfly's natural elegance. Follow these steps meticulously:
- Symmetrical Alignment: Begin by verifying that both wings are symmetrically aligned. Fold the paper diagonally and match the edges meticulously to guarantee perfect symmetry.
- Valley and Mountain Folds: Utilize valley and mountain folds to create the wing's primary shape. These folds should be sharp and distinct to provide a well-defined structure.
- Wing Tips: Shape the wing tips by folding them inward slightly. This subtle adjustment will add to the realistic appearance, mimicking the butterfly's delicate wing tips.
Adhering to these steps will yield beautifully shaped wings.
Crease Sharpness Importance
Guaranteeing the sharpness of each crease is essential for accurately shaping the wings of the origami Swallowtail butterfly, as it defines the model's overall structure and elegance.
Sharp creases enable precise folds, creating clean lines that enhance the butterfly's distinctive wing patterns. Using a bone folder or similar tool can greatly improve crease definition, thereby achieving a polished appearance.
Each crease should be meticulously aligned with the preceding folds, guaranteeing consistency throughout the model. By carefully pressing down on each fold, you enhance the paper's memory, helping the wings maintain their shape.
This attention to detail not only guarantees structural integrity but also elevates the aesthetic quality, capturing the delicate beauty inherent to the Swallowtail butterfly's wings.
Symmetry and Balance
Achieving symmetry and balance in the wings is essential for replicating the natural elegance of the Swallowtail butterfly in origami form. Precision in the folds will create a harmonious and aesthetically pleasing result, reflecting the butterfly's intricate wing patterns.
Follow these steps to guarantee symmetrical wings:
- Mirror Fold Technique: Fold both wings simultaneously to maintain proportionality.
- Alignment Check: Continuously verify that the edges and corners align perfectly after each fold.
- Symmetrical Detailing: Add intricate details symmetrically, such as the swallowtail's distinctive tail extensions, to enhance realism.
These meticulous steps guarantee that the wings of your origami butterfly are not only symmetrical but also balanced, capturing the essence of the Swallowtail butterfly.
Form the Body

To form the body of the origami swallowtail butterfly, begin by making precise base creases that will serve as the foundation.
Carefully fold these creases to guarantee the structure is symmetrical and sturdy.
Next, focus on shaping the butterfly's body, paying attention to the contours and proportions to achieve a lifelike appearance.
Fold Base Creases
Begin by folding the origami paper diagonally in both directions to create a set of intersecting creases that will serve as the base for the swallowtail butterfly's body. This foundational step guarantees symmetry and precision in the final form. Follow these steps meticulously:
- Diagonal Folds: Fold the paper diagonally from corner to corner, first one way and then the other, to produce an 'X' crease pattern.
- Horizontal and Vertical Folds: Fold the paper in half along both the horizontal and vertical axes, creating a 'plus' sign that intersects with the 'X'.
- Flatten and Reinforce: Unfold the paper and reinforce all creases by pressing firmly along each line, guaranteeing crisp and defined folds.
These base creases are essential for constructing a well-balanced butterfly.
Shape Butterfly Body
Frequently, the initial step in shaping the butterfly's body involves folding the paper in half along the pre-existing horizontal crease, guaranteeing the edges align perfectly. This precision is essential to achieve symmetry in the butterfly's body. Next, fold the top corners down towards the center, forming a triangle. This creates the head. Then, fold the bottom edges upwards to meet the center crease, shaping the body.
Here's a concise breakdown of these steps:
| Step | Action |
|---|---|
| 1 | Fold in half along the horizontal crease |
| 2 | Align edges perfectly |
| 3 | Fold top corners down to form a triangle |
| 4 | Fold bottom edges up to the center crease |
| 5 | Guarantee symmetry and sharp creases |
These meticulous folds will yield a well-defined butterfly body.
Add Details
Adding intricate details to your origami swallowtail butterfly can enhance its realism and visual appeal. By focusing on the nuanced elements, you can transform a simple fold into a lifelike masterpiece.
- Wing Patterns: Use a fine-tipped marker to draw delicate vein patterns on the wings, mimicking the natural lines of a swallowtail butterfly.
- Antennae: Create slender antennae by cutting thin strips of paper and attaching them to the butterfly's head, ensuring they curve gracefully.
- Color Accents: Apply subtle shades of color using watercolor pencils or pastels to highlight specific areas, such as the edges of the wings and the body, adding depth and vibrancy.
These details will breathe life into your origami creation, making it a striking representation of nature's beauty.
Refine the Creases
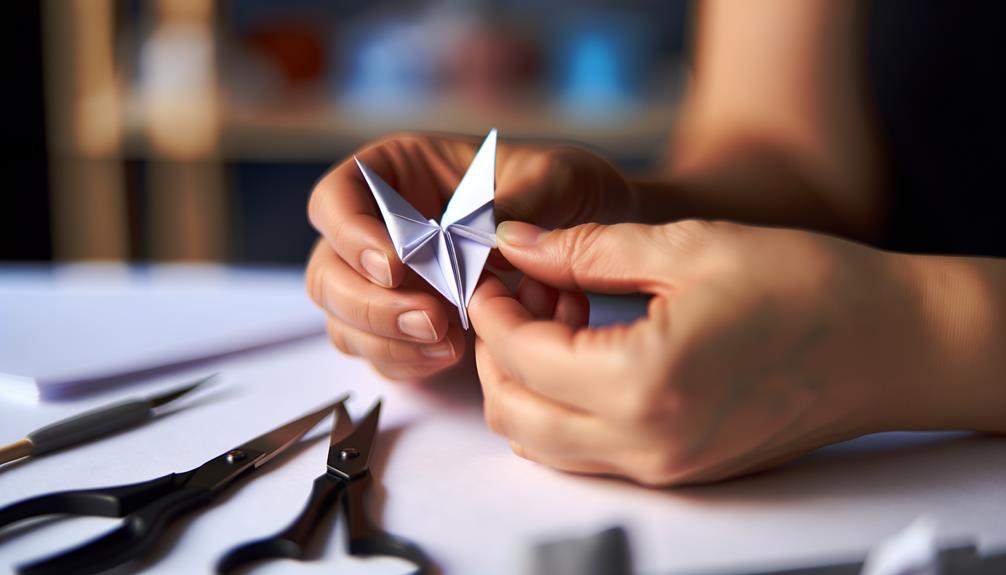
To further elevate the realism and overall presentation of your origami swallowtail butterfly, refining the creases guarantees sharp, crisp lines that enhance the structural integrity and visual appeal of your creation.
Begin by carefully retracing each fold with your fingernail or a bone folder, ensuring that every line is precise and well-defined.
Pay special attention to intricate areas such as the wings and tail, where multiple layers converge.
Smoothing out any errant wrinkles or imperfections will result in a more polished and professional appearance.
Final Adjustments
As you near the completion of your origami swallowtail butterfly, it is essential to make the final adjustments that will perfect its symmetry and guarantee its proportions are accurate.
Focus on the following aspects:
- Wing Alignment: Confirm both wings are symmetrical. Adjust any uneven folds so that the left and right wings mirror each other precisely.
- Body Shape: Refine the body by gently pressing along the central fold, making sure it is straight and smoothly contoured.
- Tail Position: The swallowtail's distinctive tail should be neatly folded and evenly spaced. Check that both tail sections are of equal length and angle.
These meticulous adjustments will transform your creation into a beautifully balanced and accurate representation of a swallowtail butterfly.
Display Your Butterfly
Showcasing your meticulously crafted origami swallowtail butterfly can enhance its visual appeal and allow your artistry to be appreciated by others.
Consider framing the butterfly in a shadow box to create a three-dimensional display that elevates its elegance. Alternatively, you can attach it to a wire or thin thread, suspending it in mid-air to mimic natural flight.
Positioning the butterfly near a light source can accentuate its delicate folds and intricate details. For a more dynamic arrangement, incorporate multiple butterflies in varying sizes and colors on a decorative branch or within a glass dome.
These methods not only protect your creation but also present it in a manner that celebrates both the intricacy and freedom inherent in origami art.
Conclusion
The culmination of this intricate process results in a delicate origami swallowtail butterfly, a demonstration of the paper-folding prowess of the creator.
The meticulous steps—gathering materials, preparing paper, folding the base, shaping wings, forming the body, adding details, refining creases, and making final adjustments—demand not only patience but a level of dedication that rivals that of a master artisan.
The finished product, a fragile paper replica, serves as a poignant reminder of the boundless potential of human creativity when applied to the most mundane of materials.